Handover Process
Overview
Section titled “Overview”This procedure guide explains how to use the Client Handover Process to transfer documents, files, and organizational context to a recipient organization. The handover wizard walks through 5 steps: setting up the recipient organization, selecting files, choosing transfer options, confirming, and executing the file transfer. Background jobs track the progress of long-running transfers.
Table of Contents
Section titled “Table of Contents”- Accessing the Handover Tab
- The Handover Table (Existing Handovers)
- Starting a New Handover
- Step 1 — Organization Details
- Step 2 — File Selection
- Step 3 — File Mode & Options
- Step 4 — Confirm Handover
- Step 5 — File Transfer
- Draft System
- Handover Background Jobs
- Handover Statuses
- Troubleshooting
Accessing the Handover Tab
Section titled “Accessing the Handover Tab”- Log in with admin privileges
- Open the Admin Dashboard from the main navigation
- Select the “Client Handover” tab
For a map of all Admin Dashboard tabs, see the Administration Introduction.
The Handover Table (Existing Handovers)
Section titled “The Handover Table (Existing Handovers)”When you first open the Client Handover tab, you land on the Handover Table — a list of all previous and in-progress handovers for your organization.
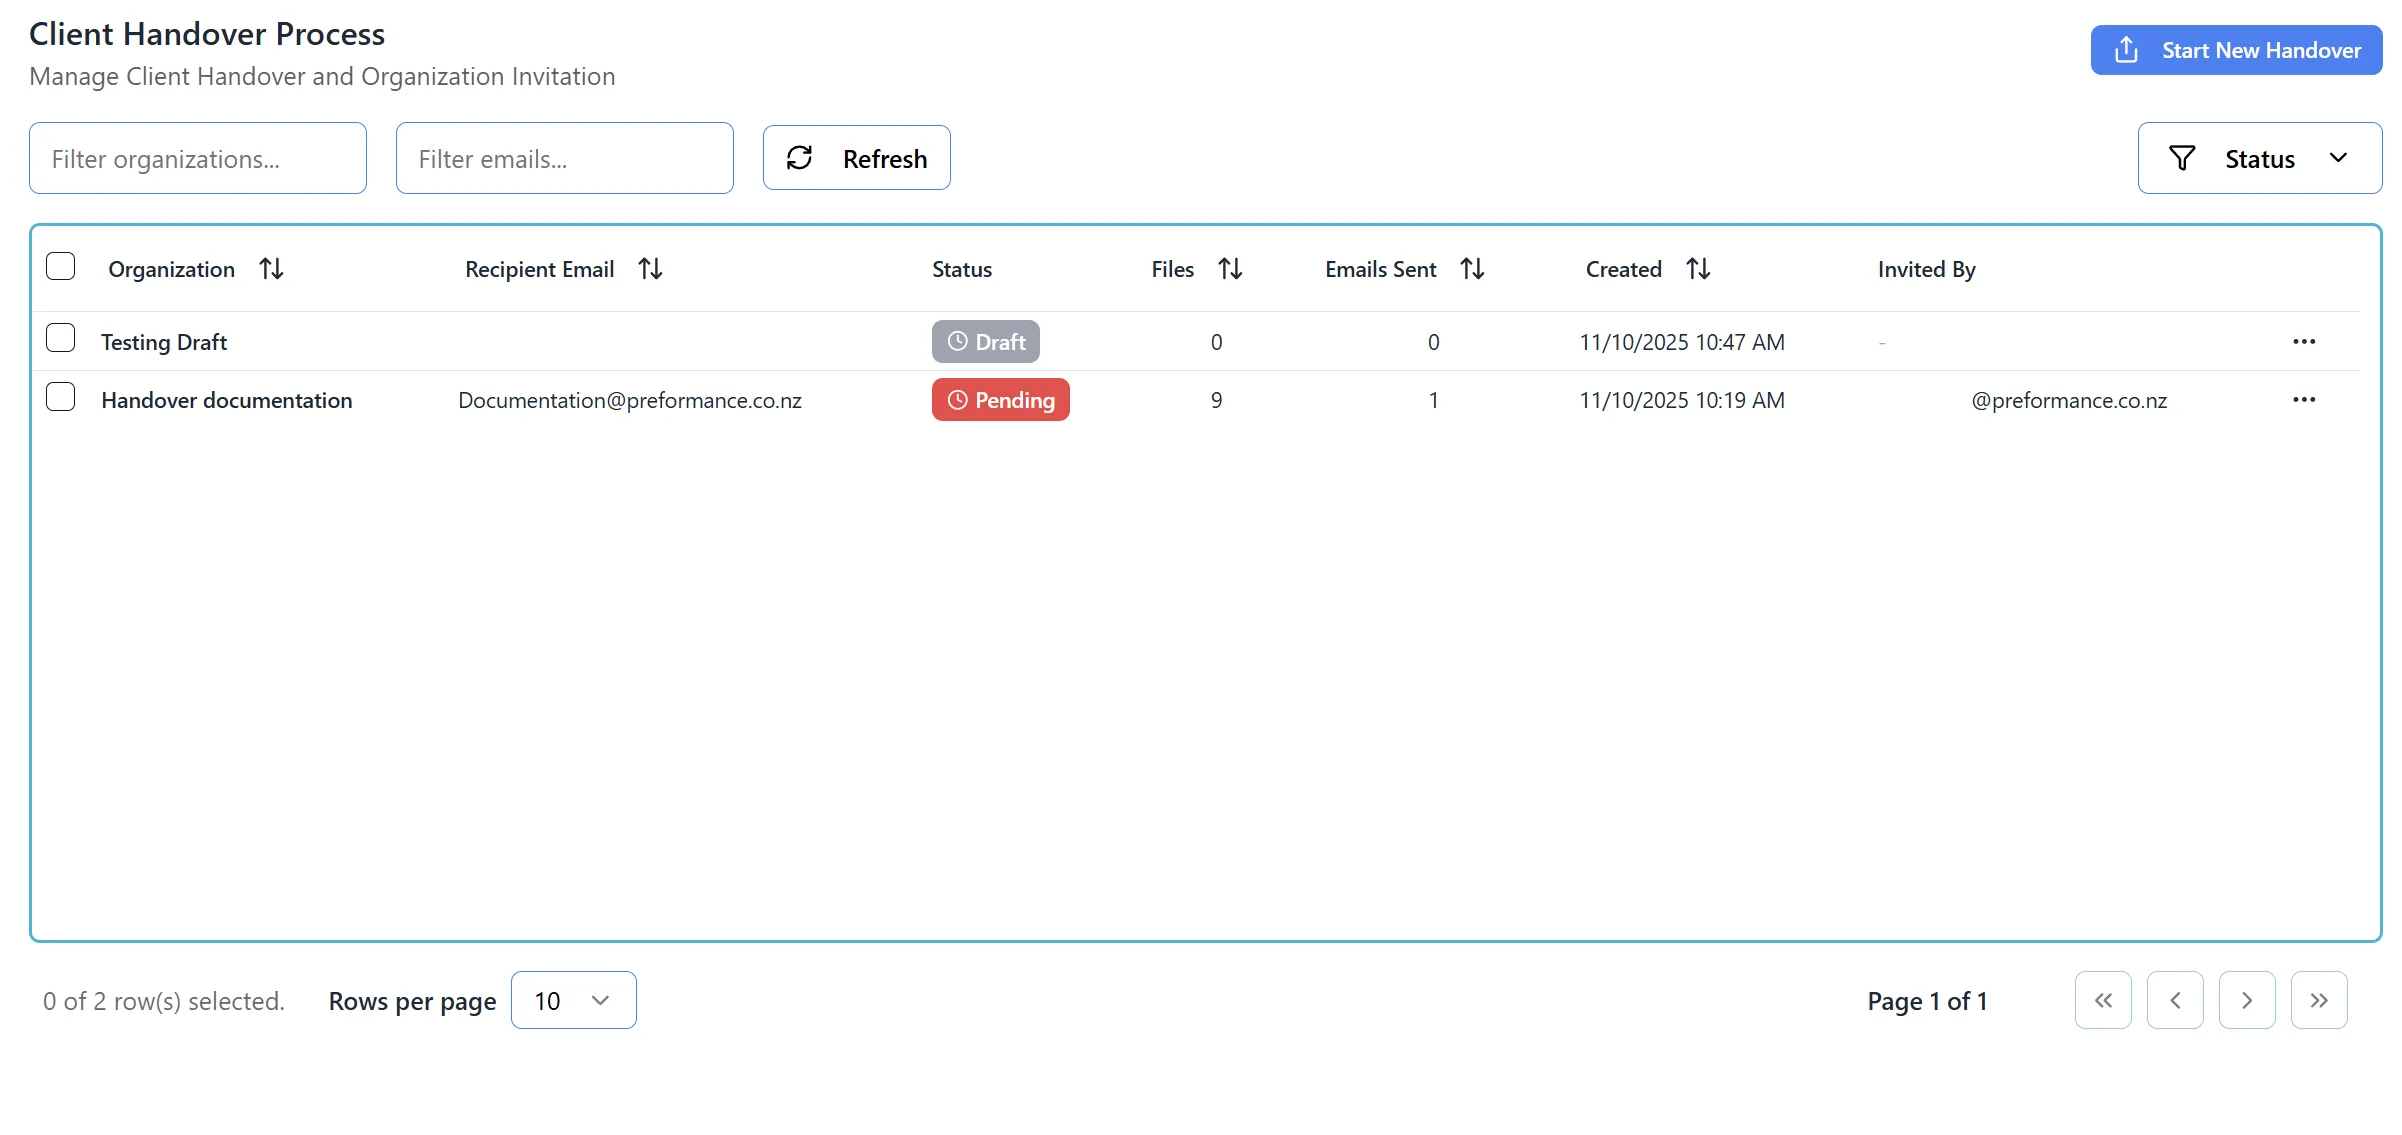
Table Information
Section titled “Table Information”Each row displays:
- Recipient organization name
- Recipient email
- File count — number of documents included in the handover
- Status — current handover status (see Handover Statuses)
- Created date
Interacting with Rows
Section titled “Interacting with Rows”- Click any row to open that handover:
- Draft handovers open in edit mode — you can resume where you left off
- Sent handovers (Pending, Completed, Expired, Cancelled) open in read-only mode — you can review details but cannot modify them
Top-Right Controls
Section titled “Top-Right Controls”- Background Jobs button (clock icon) — opens the Handover Background Jobs modal to view active and completed transfer jobs
- Start New Handover button (blue) — begins the 5-step handover wizard
Starting a New Handover
Section titled “Starting a New Handover”- From the Handover Table, click the “Start New Handover” button in the top-right corner
- The wizard opens at Step 1 — Organization Details
- A progress bar at the top displays all 5 steps; completed steps are highlighted
Note: The Background Jobs button is accessible from the header at any step in the wizard, not just the table view.
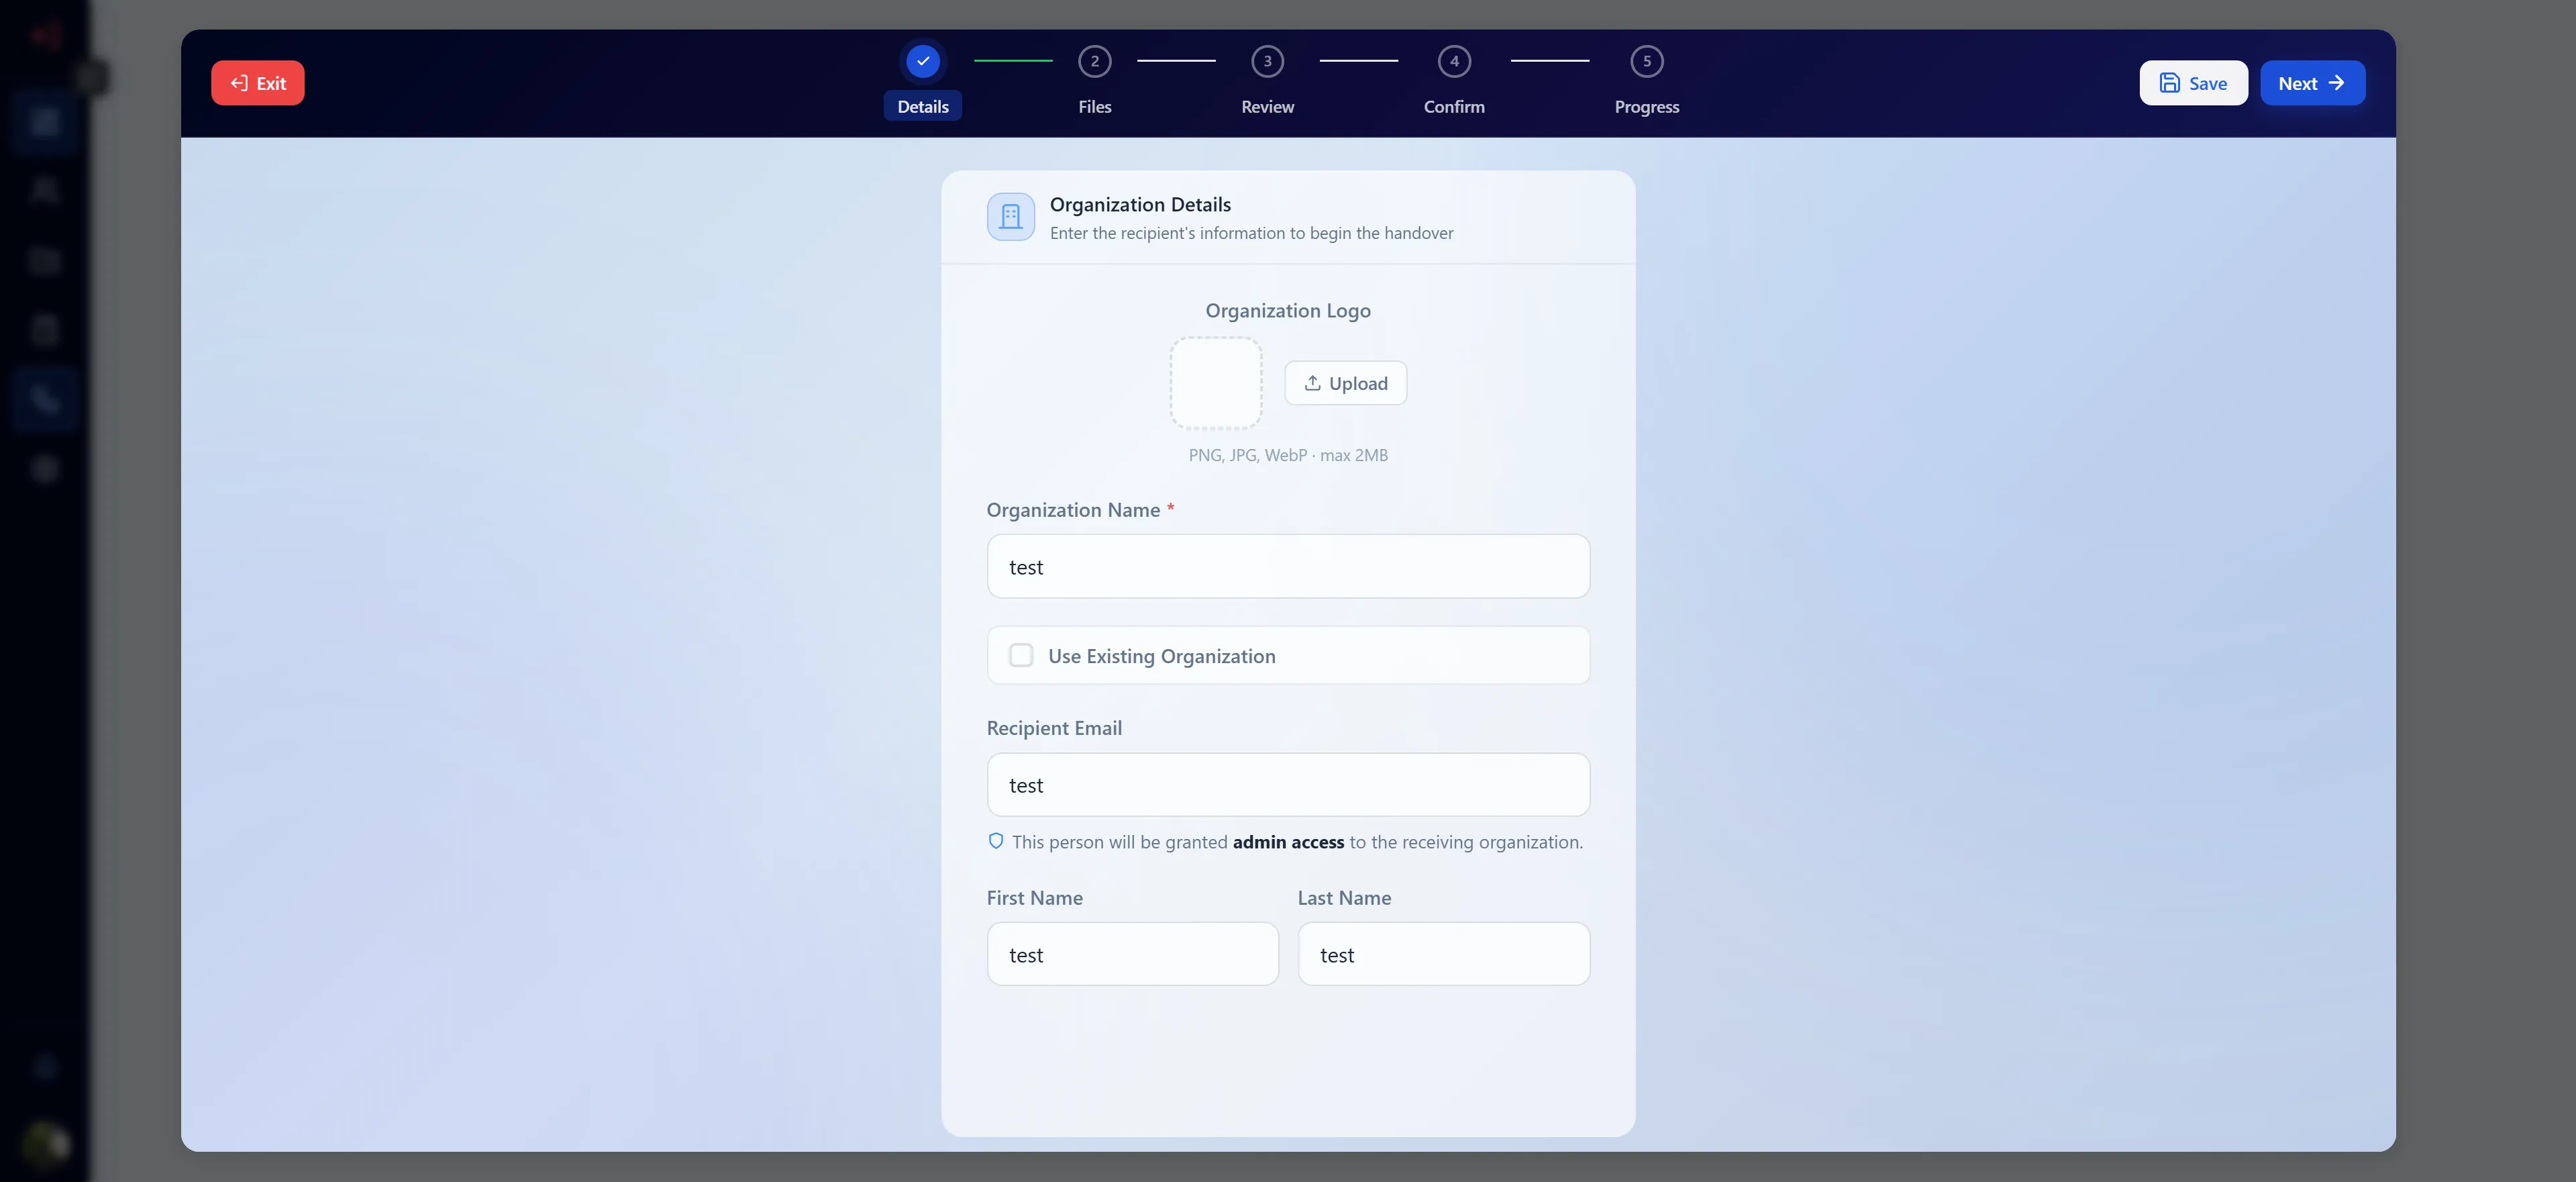
Step 1 — Organization Details
Section titled “Step 1 — Organization Details”This step captures information about the recipient organization and the primary contact who will receive admin access.
Fields
Section titled “Fields”| Field | Required | Description |
|---|---|---|
| Organization Logo | Optional | Square image (PNG, JPG, WebP · max 2 MB). Click the dashed placeholder or the “Upload” button to select a file. Click “Remove” to clear it. |
| Organization Name | Yes (new org) | The name for the new recipient organization. Hidden if “Use Existing Organization” is checked. |
| Recipient Email | Yes | Email address of the person who will receive admin access to the organization. |
| First Name | Yes (new org) | Recipient’s first name. Hidden if “Use Existing Organization” is checked. |
| Last Name | Yes (new org) | Recipient’s last name. Hidden if “Use Existing Organization” is checked. |
Use Existing Organization
Section titled “Use Existing Organization”If you want to hand files over to an organization that already exists in the system:
- Check the “Use Existing Organization” toggle — the Organization Name and First/Last Name fields are hidden
- An “Existing Organization (ID or Name)” field appears — enter either the organization’s UUID or its exact name
- The recipient email must still be provided; they will be granted admin access to the existing org
- No new organization is created
Navigation
Section titled “Navigation”- Cancel — returns to the Handover Table without saving (unless already saved as a draft)
- Save as Draft — saves current details to the database as a draft; you can resume later from the Handover Table
- Next → — validates all required fields, then advances to Step 2
Tip: Press Enter on any input field to advance to the next step (equivalent to clicking Next →).
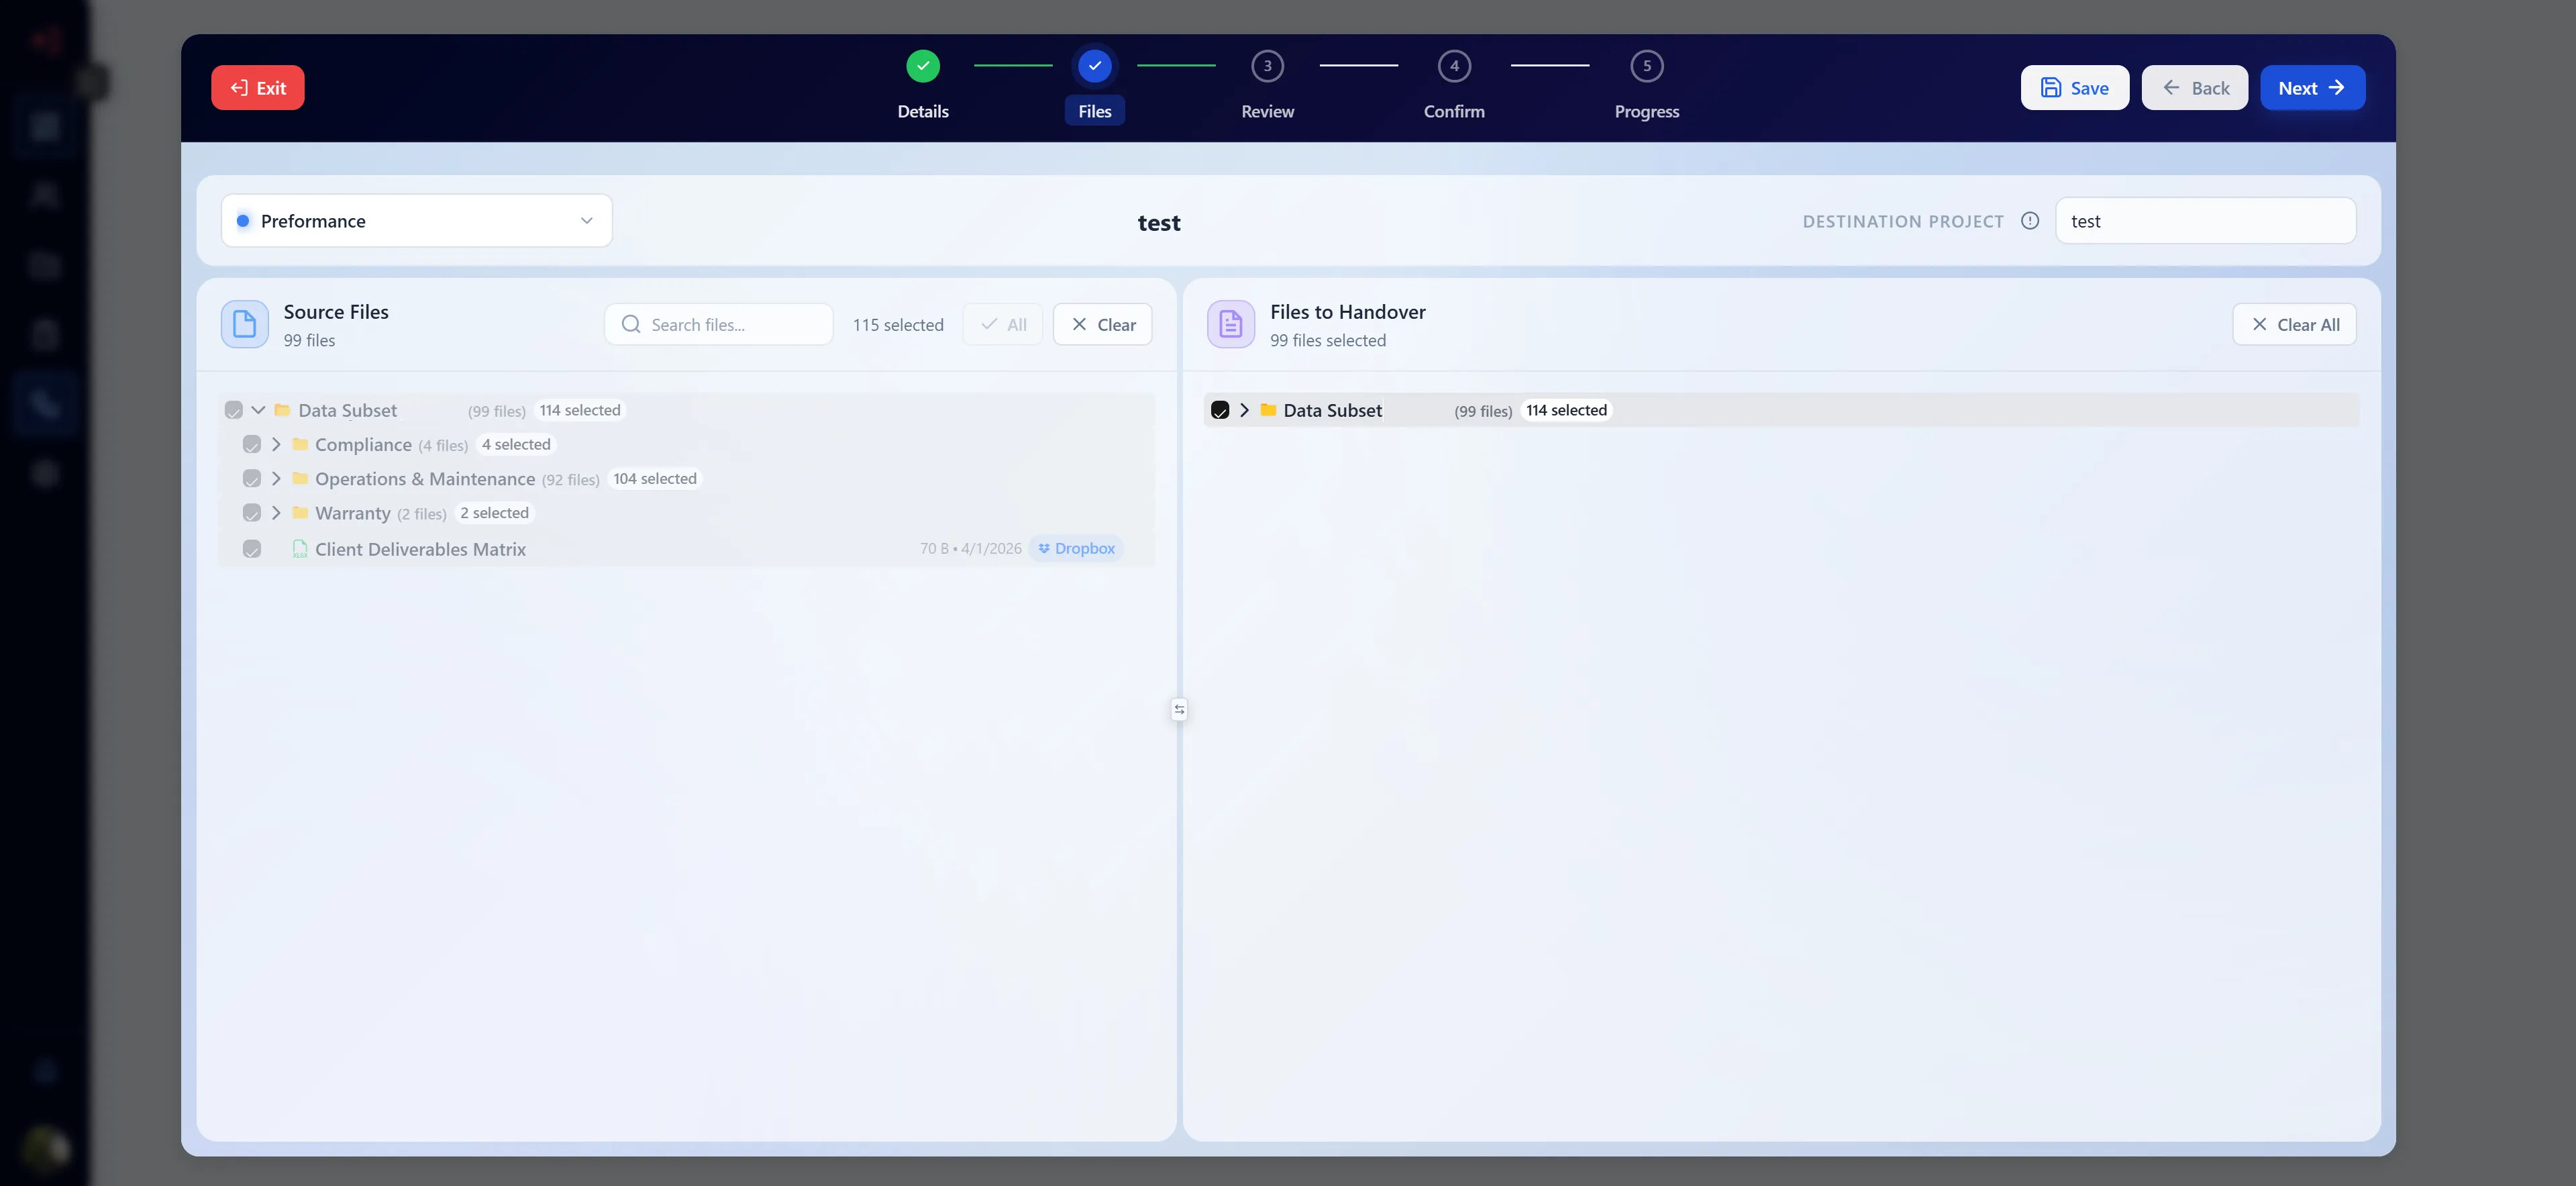
Step 2 — File Selection
Section titled “Step 2 — File Selection”This step lets you choose which documents from your organization to include in the handover.
Layout
Section titled “Layout”The step uses a dual-panel layout:
- Left panel — source document browser (your organization’s files)
- Right panel — selected files list (files staged for handover)
A draggable divider between the panels lets you resize each side.
Source Panel (Left)
Section titled “Source Panel (Left)”Filtering & Search
- Use the Project dropdown in the config bar to filter documents by project
- Use the Search bar to search file names within the selected project
View Toggle
- Tree View — displays documents in a folder/project hierarchy; click arrows to expand folders
- Table View — displays documents as a flat list with sortable columns
Selecting Files
- Check the checkbox next to individual files to add them to the selection
- Check a folder/project checkbox to select all files within it recursively
- Selected files move to the Right panel (selection list)
- A badge in the panel header shows the total selected count
Destination Project
Section titled “Destination Project”In the config bar, you can set:
- Source Project (left dropdown) — filters the source document browser to a specific project
- Destination Project Name (text input, right side) — the name of the project that will be created inside the recipient organization to hold the transferred files
Read-Only Mode
Section titled “Read-Only Mode”If you opened a sent (non-draft) handover, Step 2 displays the originally selected files in read-only mode. No changes can be made.
Navigation
Section titled “Navigation”- ← Back — returns to Step 1
- Save as Draft — saves selections to the database
- Next → — advances to Step 3 (requires at least one file selected)
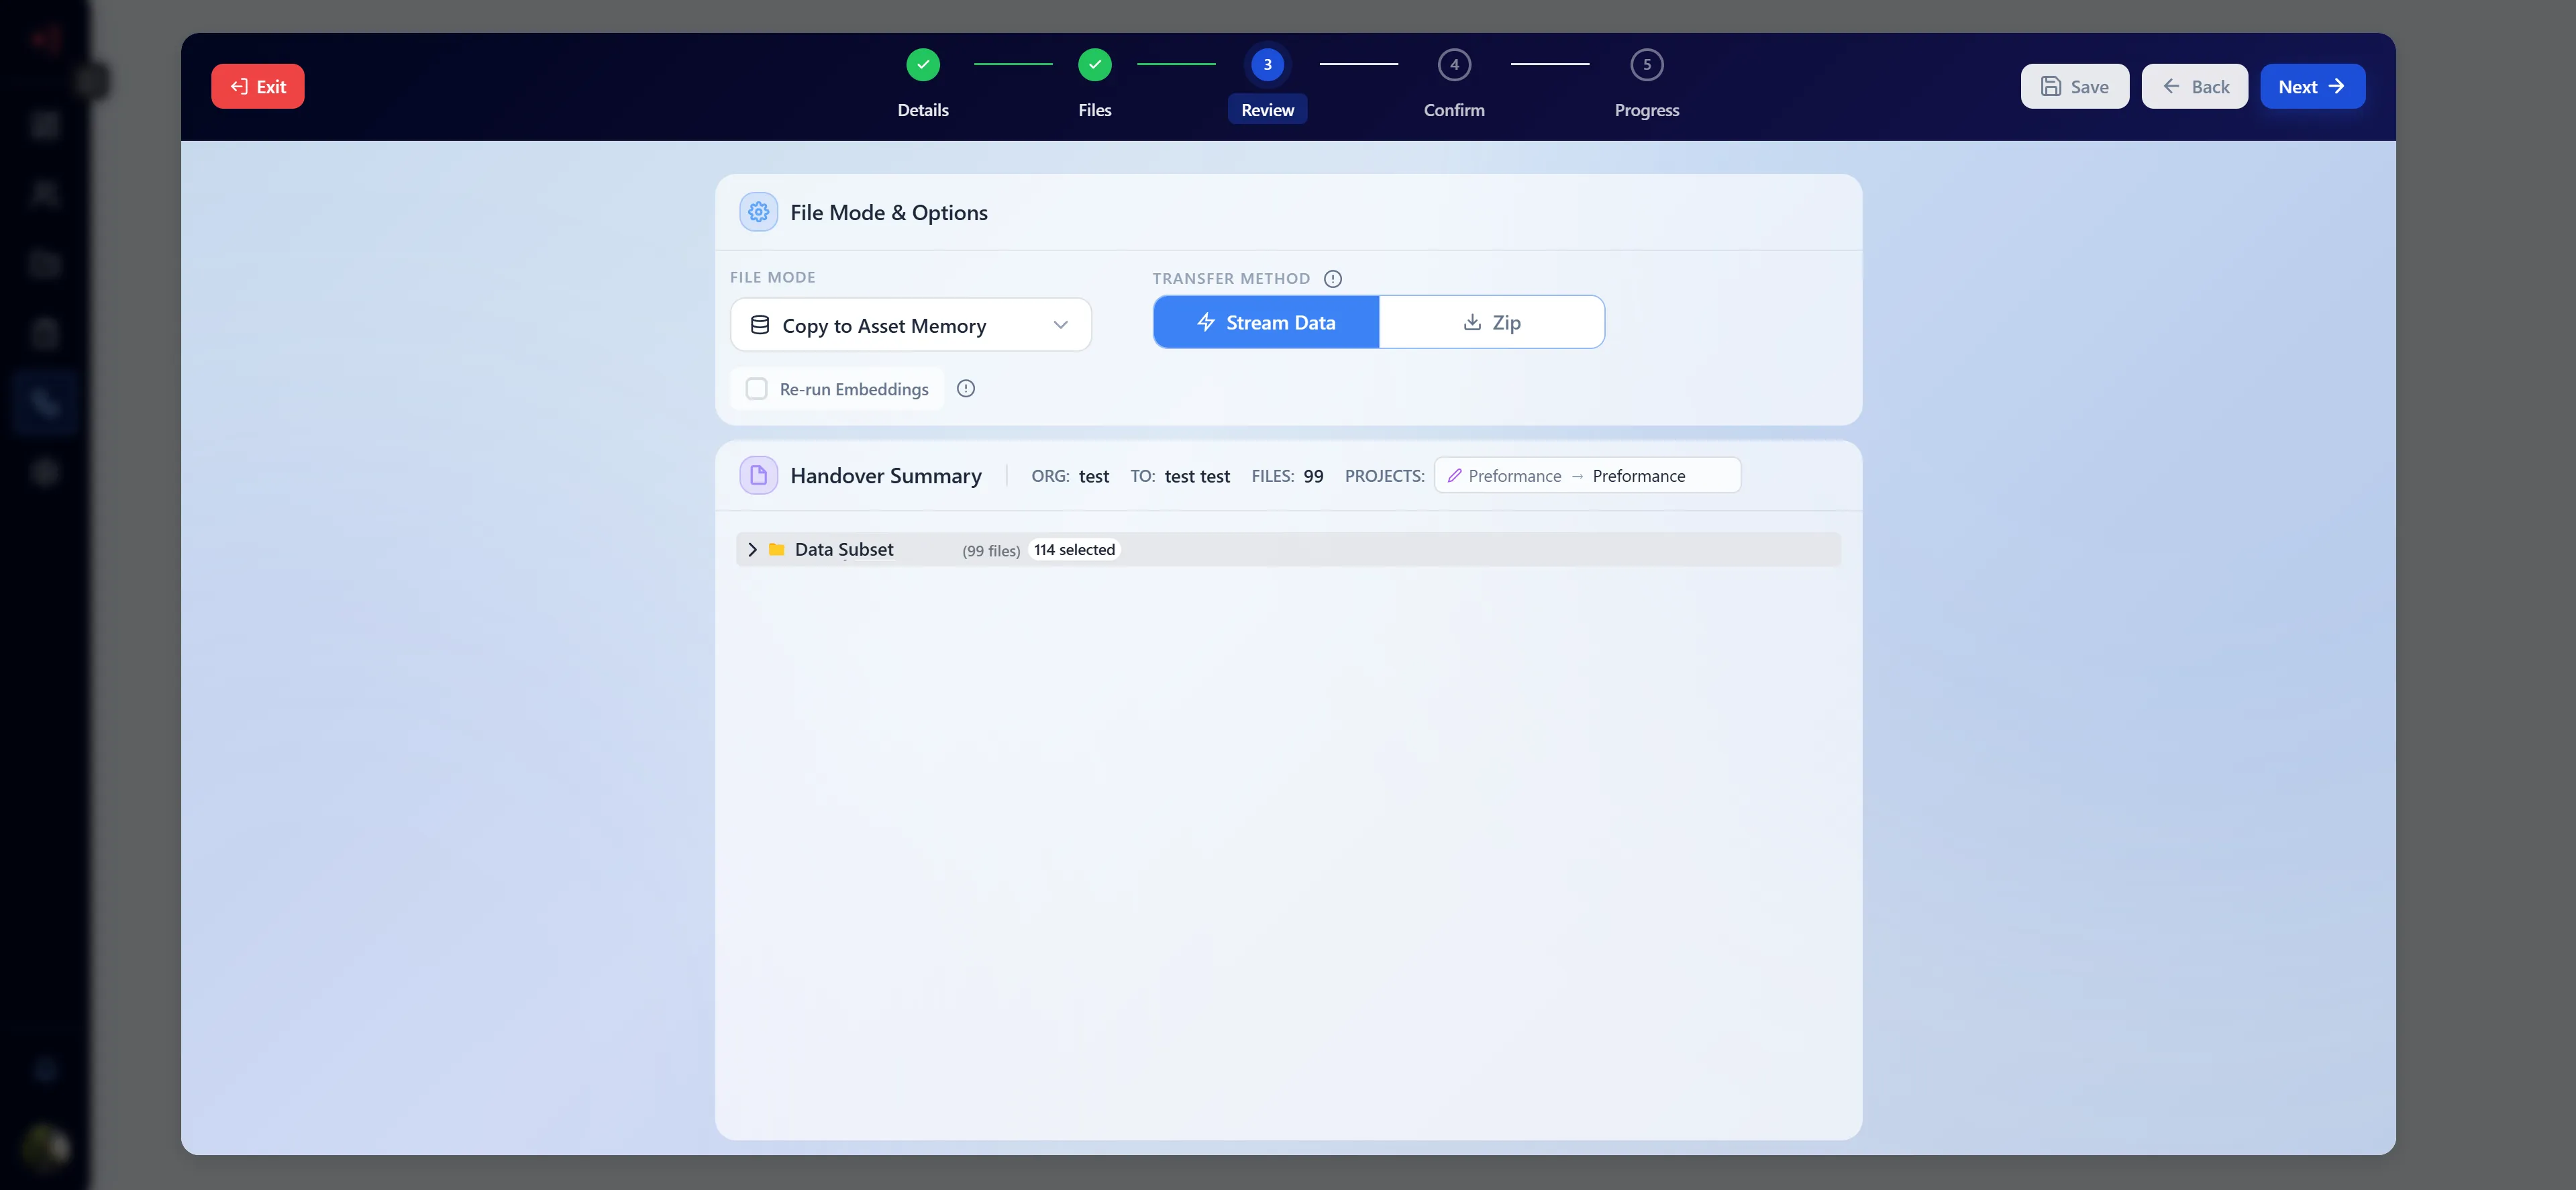
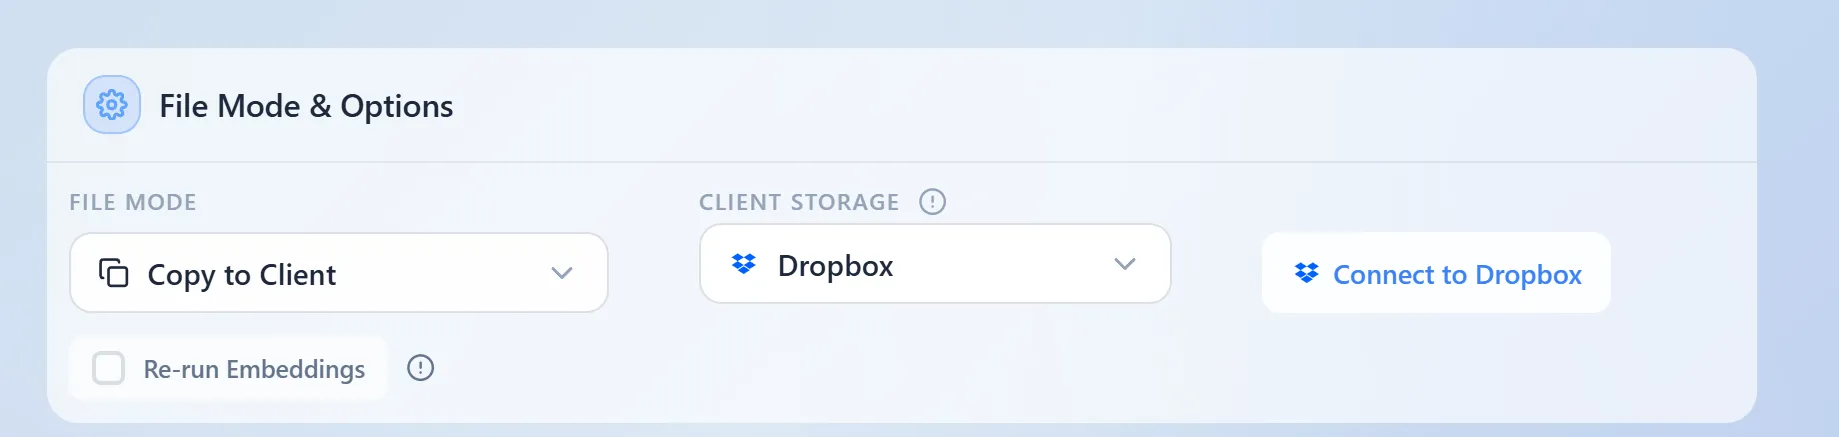
Step 3 — File Mode & Options
Section titled “Step 3 — File Mode & Options”This step controls how files are transferred to the recipient.
File Mode
Section titled “File Mode”Select the transfer destination using the File Mode dropdown:
| Option | Value | Description |
|---|---|---|
| Copy to Asset Memory | 1 | Files are copied into the recipient’s new organization database within Asset Memory. The recipient can immediately search and query the documents. |
| Copy to Client | 2 | Files are transferred directly to the client’s connected cloud storage (currently Dropbox only). |
When File Mode = “Copy to Asset Memory”
Section titled “When File Mode = “Copy to Asset Memory””Transfer Method
Section titled “Transfer Method”A Stream Data / Zip toggle lets you choose how the files are delivered:
| Method | Description |
|---|---|
| Stream Data | Files are automatically transferred file-by-file directly into the recipient organization’s Asset Memory database. Progress is shown in real time in Step 5. Files are immediately searchable after transfer. |
| Zip | All selected files are compressed into a single downloadable .zip archive. The recipient downloads the archive and must manually upload and reprocess the files. Useful for large batches or offline delivery. |
Re-run Embeddings
Section titled “Re-run Embeddings”- A “Re-run Embeddings” checkbox is available (with an info tooltip explaining the option)
- When checked, each file will be re-processed through the AI embedding pipeline upon transfer
- This ensures the recipient organization receives fresh, up-to-date vector embeddings
- Re-running embeddings adds processing time
When File Mode = “Copy to Client”
Section titled “When File Mode = “Copy to Client””- A Client Storage selector appears (currently only Dropbox is supported)
- Connect a Dropbox account via OAuth before proceeding
- Once connected, the Dropbox account details are shown in the selector
- Files will be transferred directly into the connected Dropbox account
Navigation
Section titled “Navigation”- ← Back — returns to Step 2
- Save as Draft — saves options to the database
- Next → — advances to Step 4
Step 4 — Confirm Handover
Section titled “Step 4 — Confirm Handover”This step presents a review summary of the handover before it is sent.
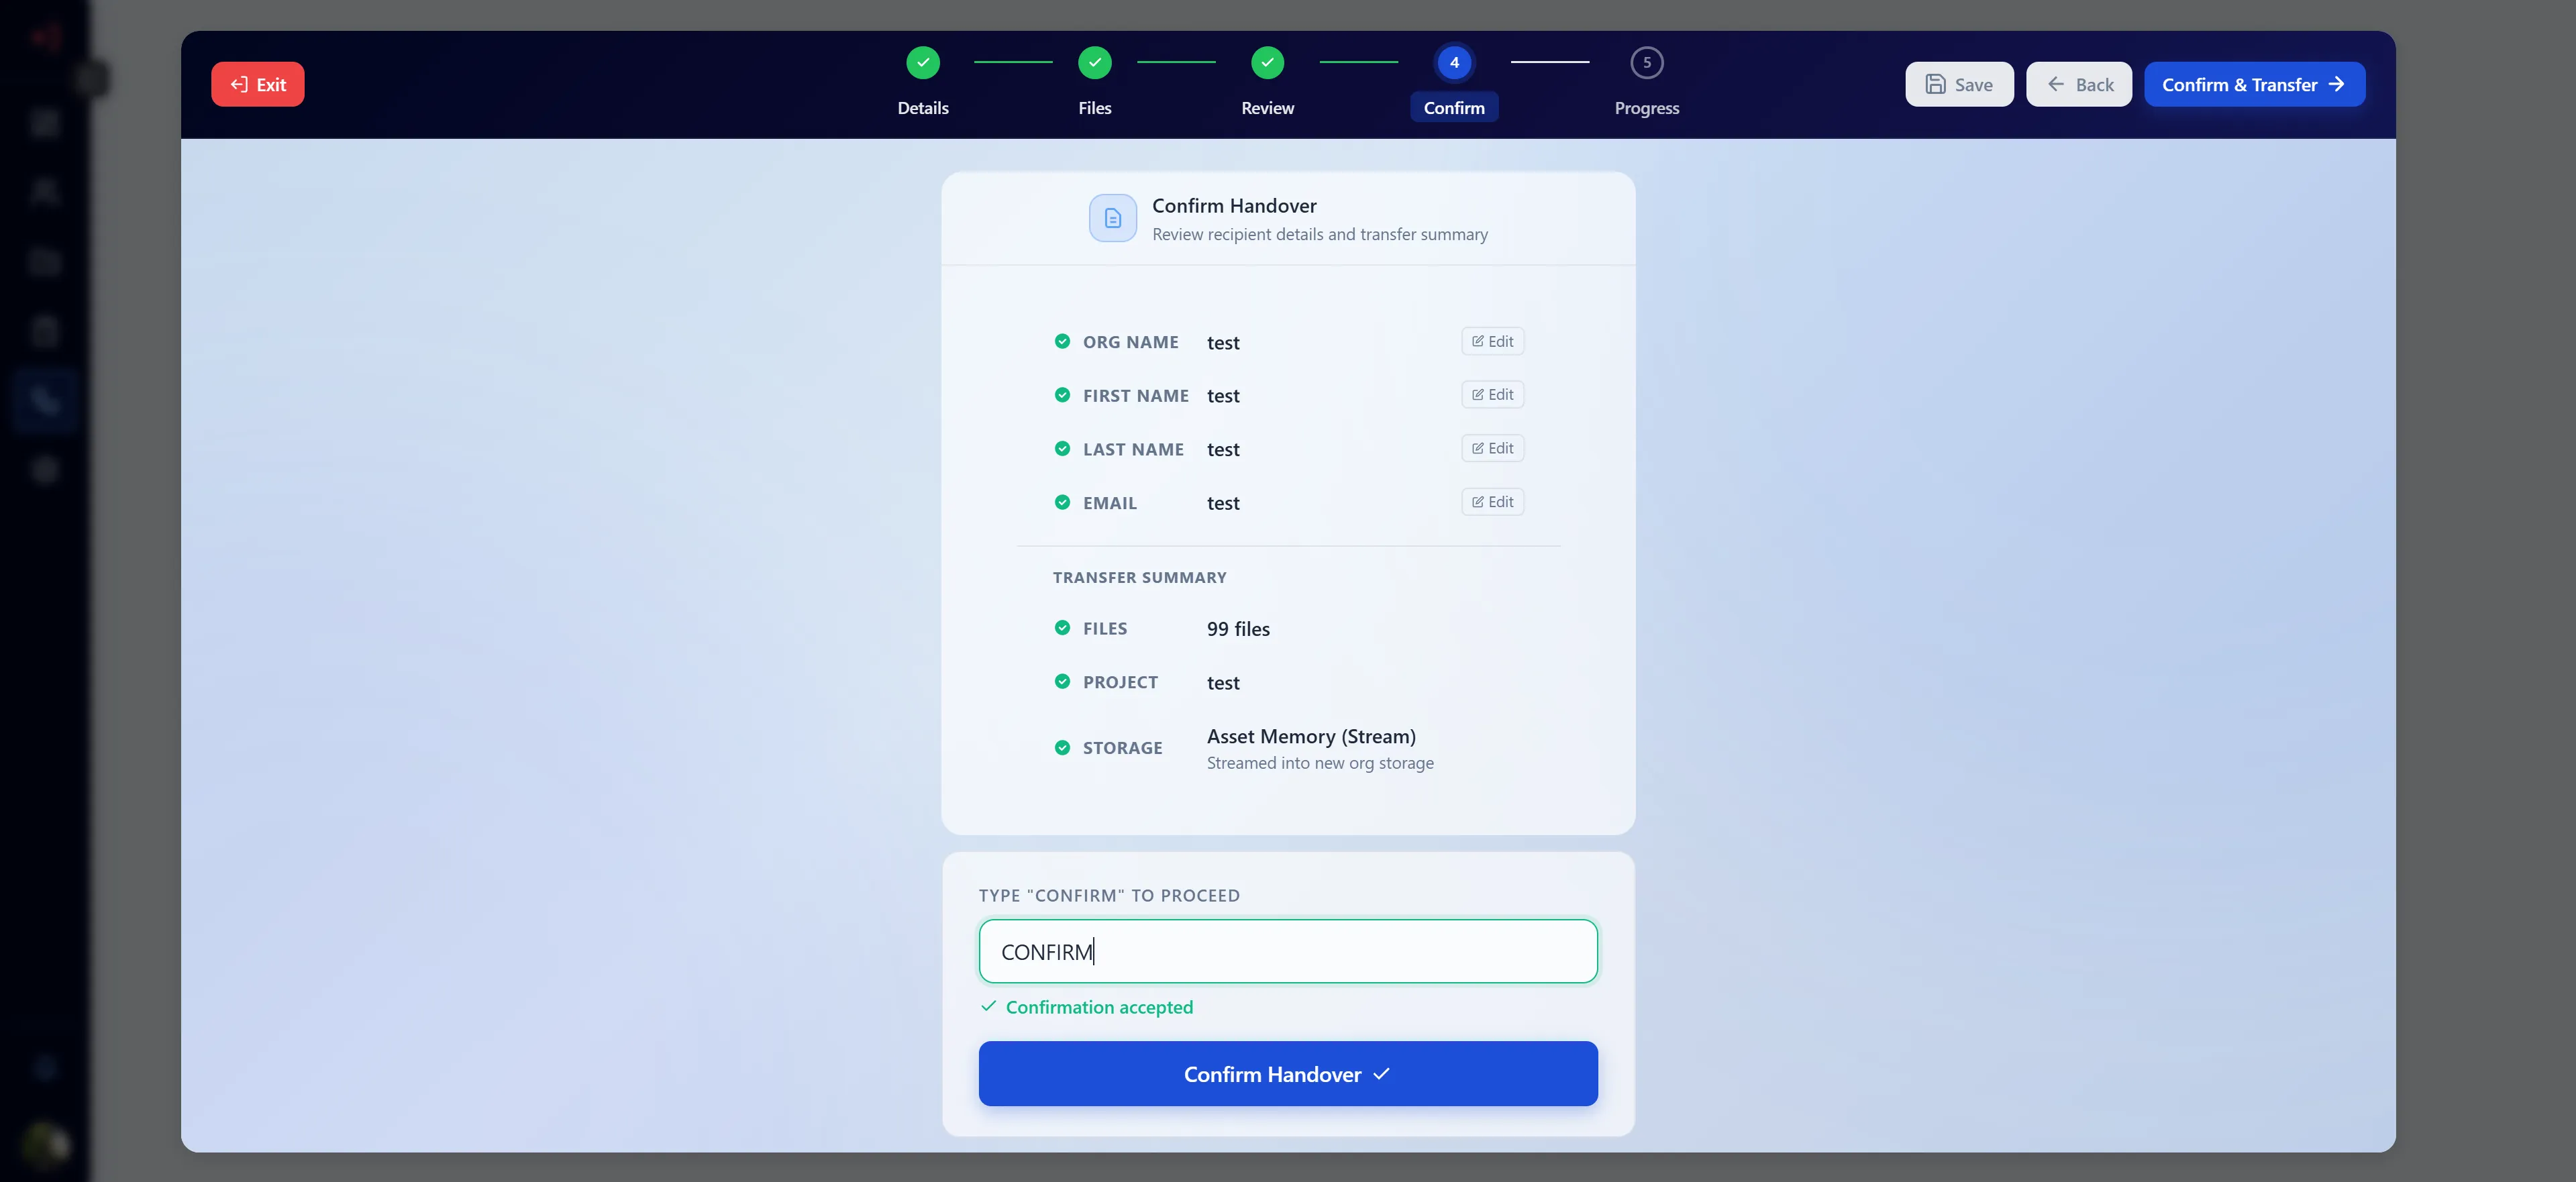
Review Summary
Section titled “Review Summary”The summary panel shows:
- Organization Name — name of the recipient organization
- Recipient Name & Email — who will receive admin access
- File Count — number of documents being transferred
- Source Project — the project selected in Step 2
- Destination Project — the new project name in the recipient org
- File Mode — Copy to Asset Memory or Copy to Client
- Transfer Method — Stream Data or Zip (if applicable)
- Re-run Embeddings — whether embeddings will be regenerated
Confirmation Input
Section titled “Confirmation Input”- Type
CONFIRM(all caps) into the confirmation text box - The “Confirm Handover” button becomes active once the text matches exactly
What Happens on Submit
Section titled “What Happens on Submit”Clicking “Confirm Handover” triggers the submission which:
- Creates the recipient organization (if new)
- Sends an invitation email to the recipient email address
- Sets the handover status to Pending
- The wizard advances to Step 5 automatically
Important: Once confirmed, the organization is created and the invitation email is sent. This action cannot be undone from the UI.
Navigation
Section titled “Navigation”- ← Back — returns to Step 3 (only available before confirming)
- Confirm Handover — submits the handover (requires “CONFIRM” typed)
Step 5 — File Transfer
Section titled “Step 5 — File Transfer”This step executes the actual file transfer and shows real-time progress.
Panel Header
Section titled “Panel Header”The header displays:
- Panel title — “File Transfer” (Stream mode) or “Zip Download” (Zip mode)
- File count — total number of files in the transfer
- Progress chips —
transferred / totalcount and error count (red chip if any errors occurred) - Background Jobs button — opens the Handover Background Jobs modal
Transfer Button States
Section titled “Transfer Button States”| State | Button Label | Description |
|---|---|---|
| Initial | Start Transfer (Stream) / Download Zip (Zip) | Begins the transfer process |
| Running | Spinner + “Transferring files to [org]…” | Transfer is in progress; button is disabled |
| Complete | Re-transfer / Re-download + green checkmark | Transfer finished; click to run again if needed |
Per-File Status Icons
Section titled “Per-File Status Icons”Files are displayed in a tree structure matching the source project hierarchy. Each file has a status icon:
| Icon | Status | Meaning |
|---|---|---|
| Grey circle | Pending | Waiting to be processed |
| Blue spinner | Transferring | Currently being transferred |
| Green ✓ | Success | Successfully transferred |
| Red ✗ | Error | Transfer failed for this file |
Zip Download Flow
Section titled “Zip Download Flow”When Transfer Method = Zip:
- Click “Download Zip” to start the zip job
- A Celery background job compresses all selected files on the server
- The job appears in the Background Jobs modal with type “Zip Export”
- Once completed, a Download button appears in the Background Jobs modal to retrieve the
.zipfile
Viewing Background Jobs
Section titled “Viewing Background Jobs”Click the “Background Jobs” button (clock/history icon) in the step header at any time to open the Handover Background Jobs modal. This is useful for monitoring long-running stream transfers or zip exports.
Draft System
Section titled “Draft System”The handover wizard includes a robust draft system so you never lose progress.
Auto-Save Behavior
Section titled “Auto-Save Behavior”- Field changes are tracked locally as you type
- Clicking “Save as Draft” (available at Steps 1, 2, and 3) persists the current state to the database
- The step you reached furthest is also saved per draft ID
Resuming a Draft
Section titled “Resuming a Draft”- Navigate to the Handover Table
- Drafts appear with a “Draft” status badge
- Click the row to reopen the handover — it resumes at the last saved step
- All previously entered values (org name, selected files, file mode, etc.) are restored
Draft vs. Read-Only
Section titled “Draft vs. Read-Only”| Mode | When | Behaviour |
|---|---|---|
| Draft (edit mode) | Handover status = Draft | All fields editable; Save as Draft available |
| Read-Only mode | Status = Pending / Completed / Expired / Cancelled | Orange “Read-only Mode” banner shown; no edits possible |
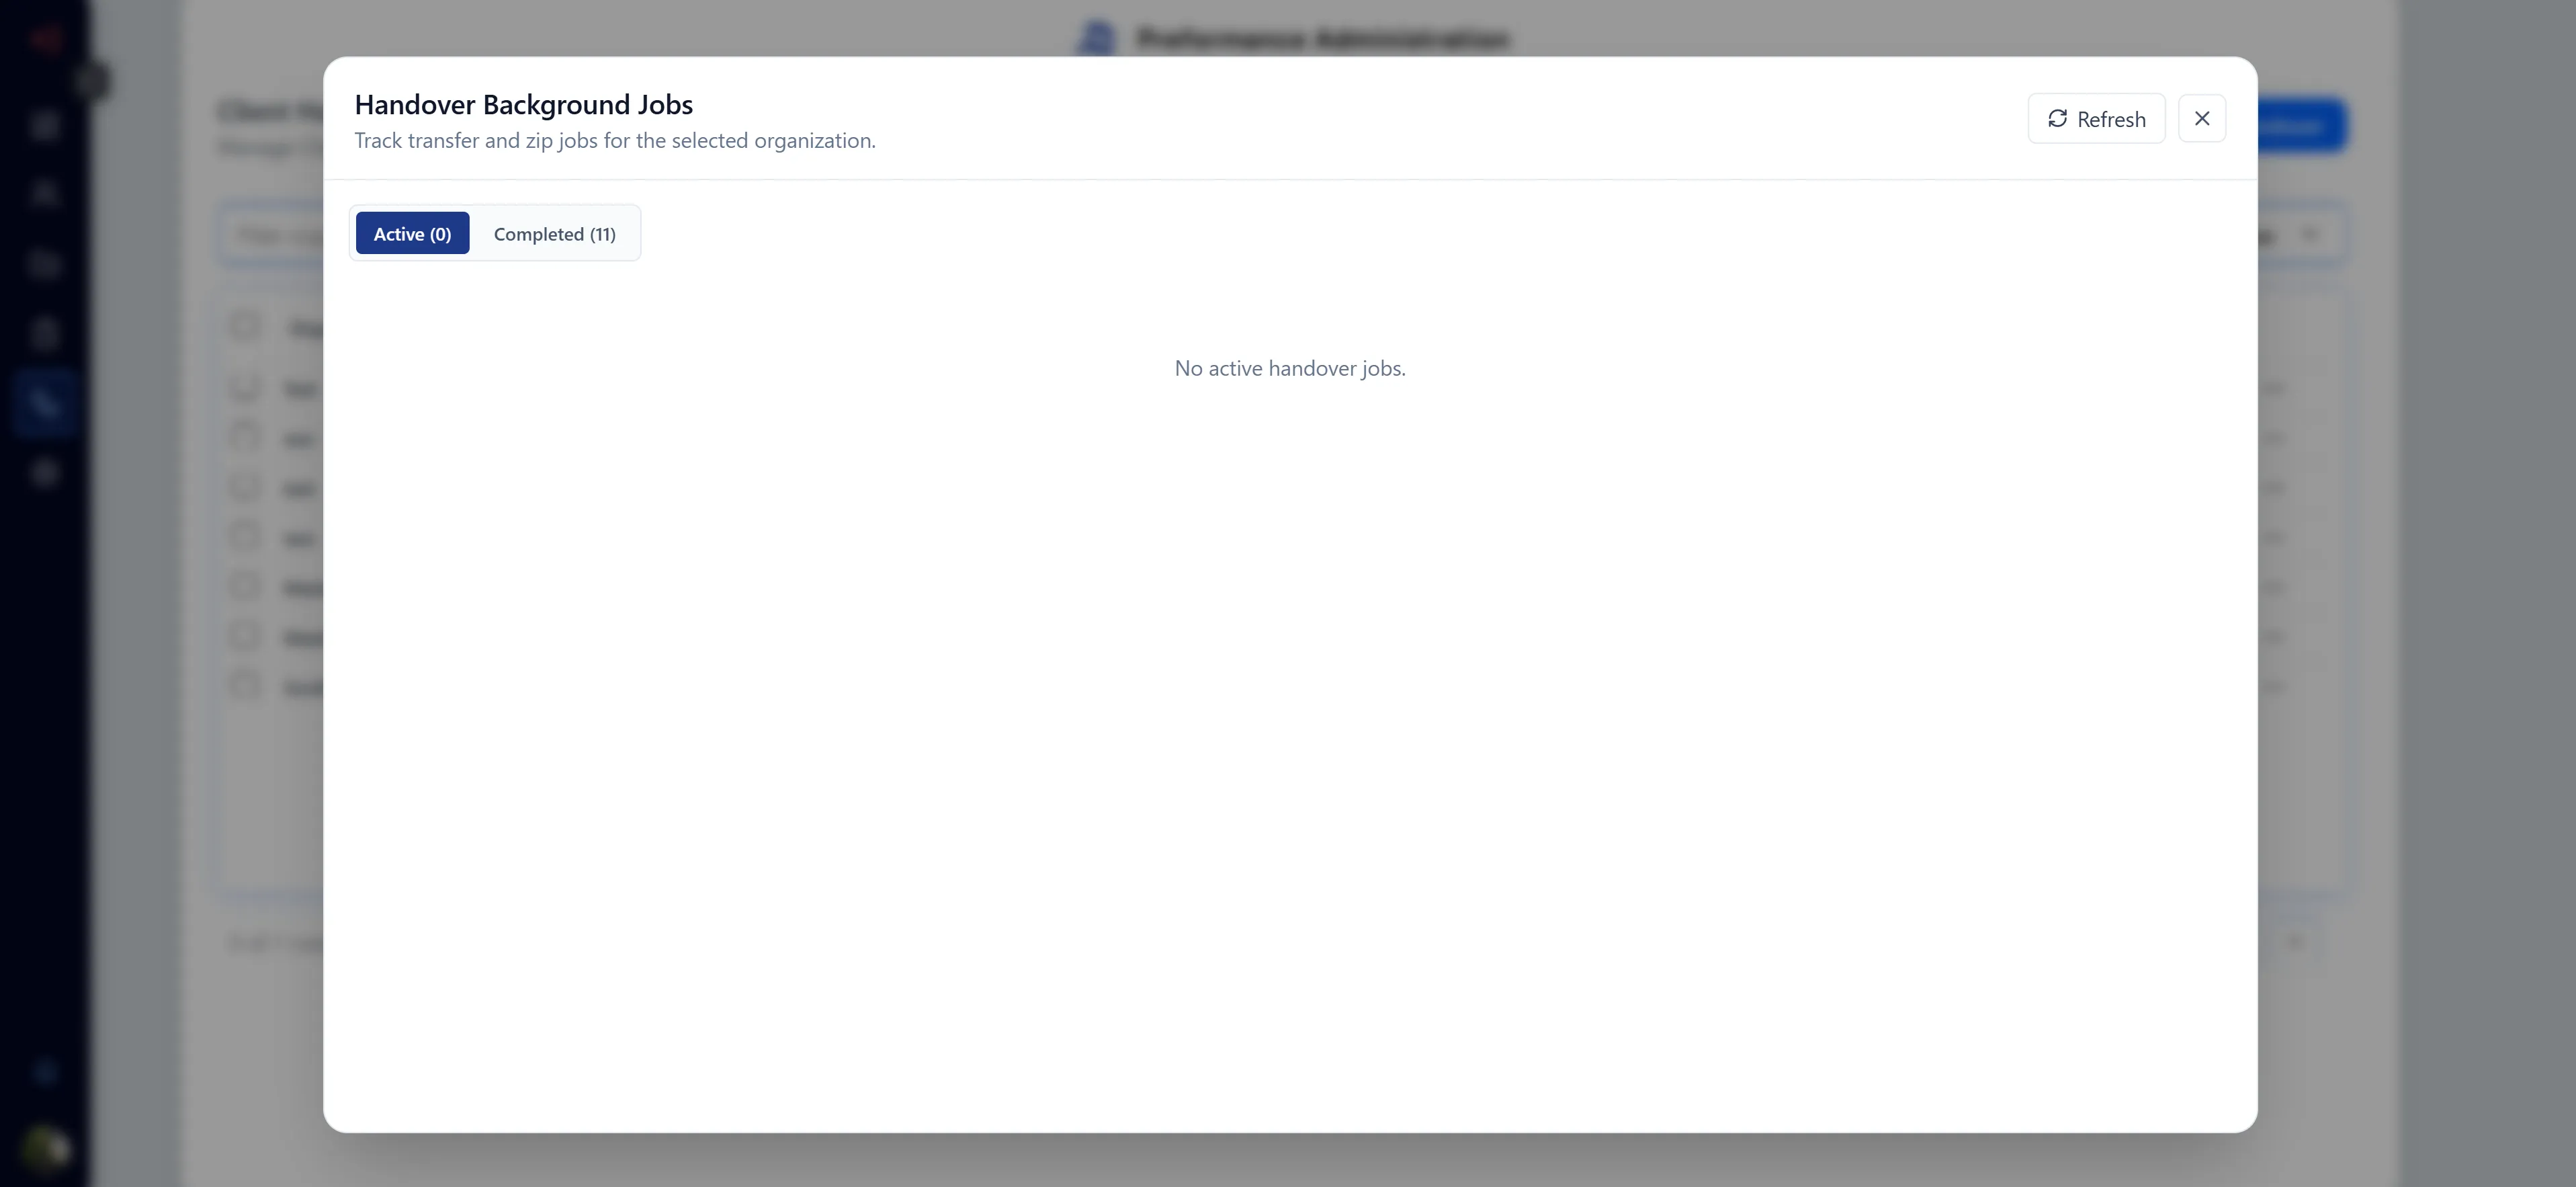
Handover Background Jobs
Section titled “Handover Background Jobs”The Background Jobs modal provides visibility into all running and completed handover transfer jobs for your organization.
Opening the Modal
Section titled “Opening the Modal”Click the “Background Jobs” button (clock/history icon) at either:
- The Handover Table header (top-right)
- The wizard header (visible at any step)
Filter Tabs
Section titled “Filter Tabs”| Tab | Shows |
|---|---|
| Active | Jobs with status Queued or Running |
| Completed | Jobs with status Completed, Failed, or Cancelled |
Active count and completed count are shown in parentheses on each tab.
Job Table Columns
Section titled “Job Table Columns”| Column | Description |
|---|---|
| Type | ”Transfer” (stream) or “Zip Export” |
| Status | Queued / Running / Completed / Failed / Cancelled (color-coded) |
| Progress | done / total (%) — number of files processed |
| Failed | Count of files that failed during this job |
| Started | Timestamp when the job began |
| Updated | Timestamp of the last status update |
| Batch ID | Unique identifier for the job (monospace) |
| Action | Context-sensitive button (Cancel / Download / —) |
Status Badge Colors
Section titled “Status Badge Colors”| Status | Color |
|---|---|
| Running | Blue |
| Queued | Grey |
| Completed | Green |
| Failed | Red |
| Cancelled | Red |
Actions
Section titled “Actions”Cancel (active jobs)
- Click Cancel on a Queued or Running job
- A confirmation dialog appears: “This will stop the job after the current file finishes. Files already processed will not be rolled back.”
- Click “Yes, cancel job” to confirm, or “Keep running” to abort
Download (completed zip jobs)
- For jobs of type “Zip Export” with status “Completed”, a Download button appears
- Click it to download the
.ziparchive directly to your browser
Expand Row
- Click any row to expand it and see a detail panel with:
- Total Files, Done, Failed, Progress % metrics
- Job error message (if any)
- Failed files table — file path and failure reason for each failed item
Auto-Refresh
Section titled “Auto-Refresh”The modal automatically polls for updates every 4 seconds while open. You can also click the Refresh button in the modal header to manually refresh.
Handover Statuses
Section titled “Handover Statuses”| Status | Description |
|---|---|
| Draft | The handover has been started but not yet confirmed. Editable. No email sent. |
| Pending | Confirmed — the organization was created and an invitation email was sent. Awaiting recipient acceptance. |
| Completed | The recipient accepted the invitation and access has been transferred. |
| Expired | The invitation link expired before the recipient accepted. |
| Cancelled | The handover was cancelled before completion. |
Troubleshooting
Section titled “Troubleshooting””Confirm Handover” button is grayed out
Section titled “”Confirm Handover” button is grayed out”- Make sure you have typed exactly
CONFIRM(all uppercase) in the confirmation text box - The button only activates on an exact match
Files appear in the source panel but cannot be selected
Section titled “Files appear in the source panel but cannot be selected”- Verify you are not in read-only mode (orange banner at top of Step 2 indicates this)
- Read-only mode is active for already-sent handovers (Pending, Completed, Expired, Cancelled)
Transfer shows errors for some files (red ✗ icons)
Section titled “Transfer shows errors for some files (red ✗ icons)”- Check the Background Jobs modal → expand the job row to see the failed files table with individual error reasons
- Common causes: file no longer exists in storage, permission issues, file too large
- Use the Re-transfer button on Step 5 to attempt a retry (successfully transferred files will be skipped)
Zip download is not available / button missing
Section titled “Zip download is not available / button missing”- The Download button only appears in Background Jobs for jobs of type “Zip Export” with status “Completed”
- If the job is still “Running” or “Queued”, wait for it to finish, then refresh the modal
- If the job shows “Failed”, check the error message in the expanded row
Background Jobs modal shows no active jobs but transfer appears stuck
Section titled “Background Jobs modal shows no active jobs but transfer appears stuck”- Click the Refresh button in the modal header to force a poll
- The modal auto-refreshes every 4 seconds — if the job is not appearing, it may have completed very quickly
- Switch to the Completed tab to check if the job finished
”Use Existing Organization” — org not found
Section titled “”Use Existing Organization” — org not found”- Make sure you enter either the exact UUID of the organization or the exact organization name (case-sensitive)
- If the org is not found during Step 1 validation, an error message will appear — double-check the value
Draft not restored after page refresh
Section titled “Draft not restored after page refresh”- Draft detection relies on both local storage and the database
- If local storage was cleared (e.g., incognito mode, browser cleared storage), the step progress indicator may reset to Step 1 — however, the draft data is still in the database and can be resumed by clicking the draft row in the Handover Table
Dropbox not connecting (Copy to Client mode)
Section titled “Dropbox not connecting (Copy to Client mode)”- Ensure your Dropbox integration is active under the Connectors settings tab
- OAuth requires pop-ups to be allowed for the application domain
- If the connect window closes without success, check browser popup blockers