Managing Users
This procedure guide explains how to use the Users tab to manage users in your organization. The Users tab allows administrators to view, add, edit, and manage user accounts, roles, permissions, and statuses.
Table of Contents
Section titled “Table of Contents”- Accessing the Users Tab
- Understanding the Users Table
- Filtering and Searching Users
- Viewing User Information
- Adding New Users
- Editing User Roles
- Changing User Status
- Managing Project Permissions
- Resending Invitations
- Deleting Users
- Customizing Table View
- Key Features Summary
- Best Practices
- Troubleshooting
- Security Notes
Accessing the Users Tab
Section titled “Accessing the Users Tab”Step 1: Navigate to Admin Dashboard
Section titled “Step 1: Navigate to Admin Dashboard”- Log in to the application with admin privileges
- Navigate to the Admin Dashboard (typically accessible from the main navigation menu)
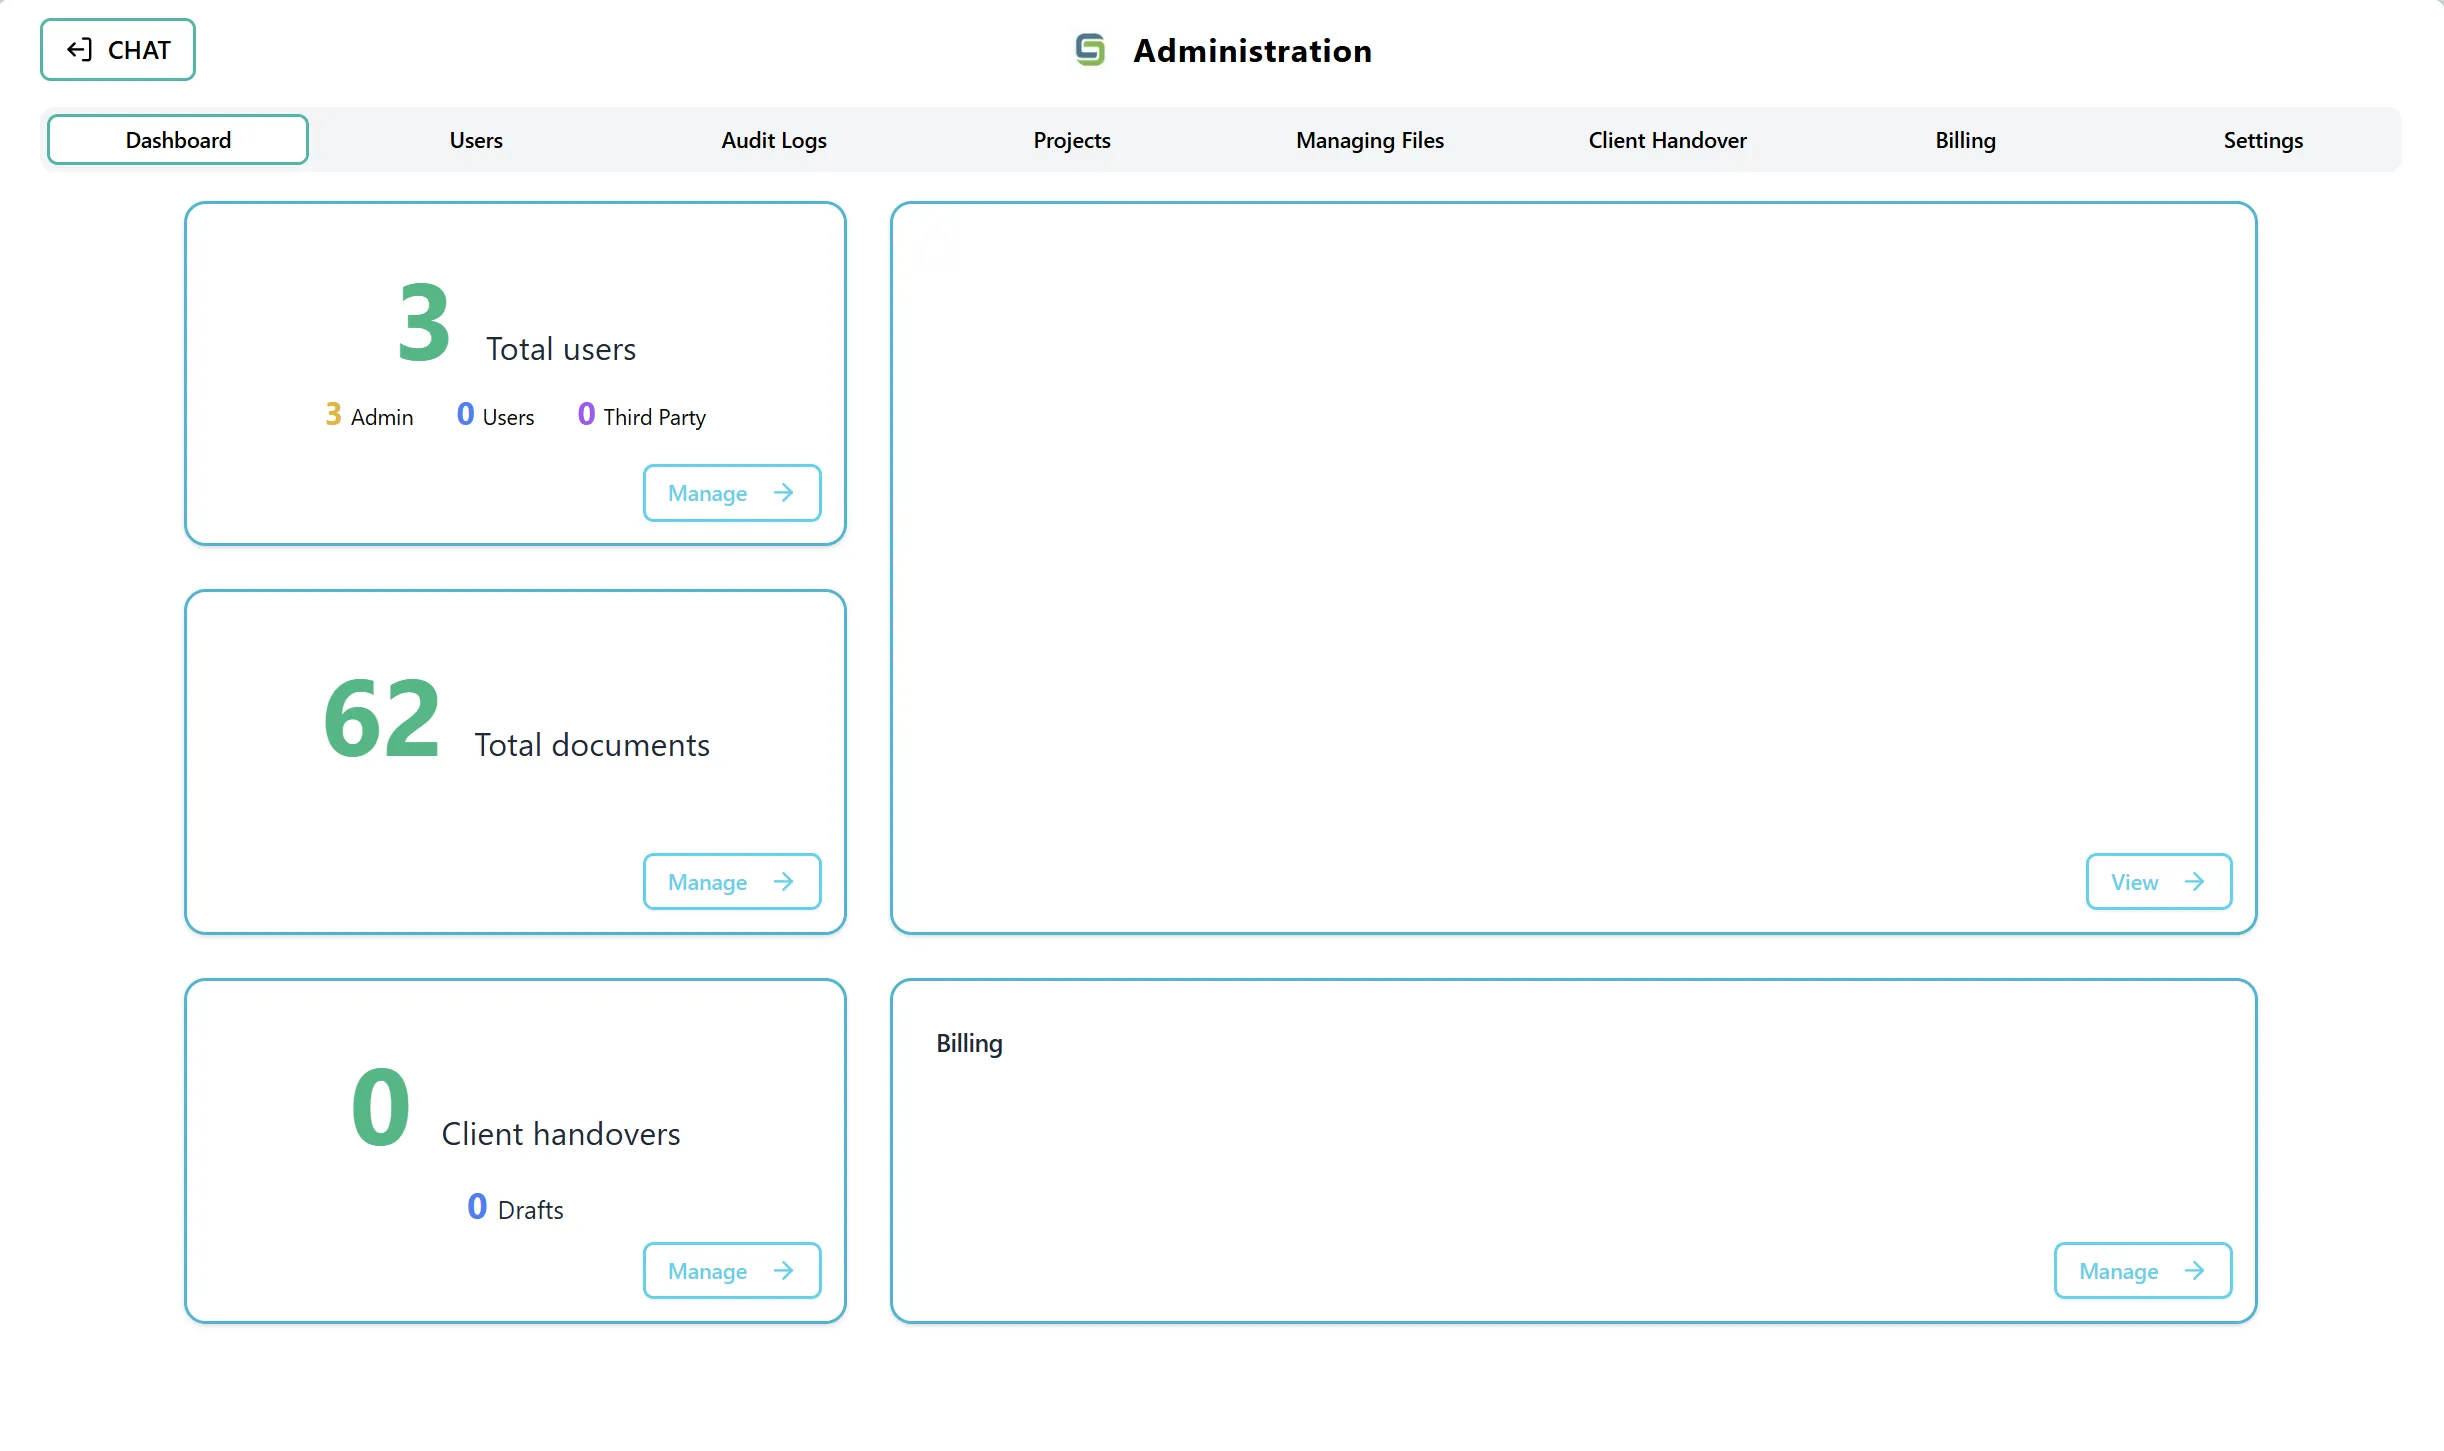
- The dashboard displays several cards showing statistics and quick access to different admin features
Step 2: Access the Users Tab
Section titled “Step 2: Access the Users Tab”You can access the Users tab in two ways:
Option A: Using the Users Card On the Admin Dashboard, you will see a card labeled “Total users” that displays:
- Total number of users in your organization
- Breakdown of user types: Admins (in yellow), Users (in blue), and Third Party (in purple)
- A “Manage” button in the bottom-right corner
Option B: Using the Navigation Tab You can also directly select the “Users” tab from the top navigation tabs in the Admin section. This tab is located alongside other admin sections such as Dashboard, Audit Logs, Projects, Managing Files, Client Handover, and Settings.
Understanding the Users Table
Section titled “Understanding the Users Table”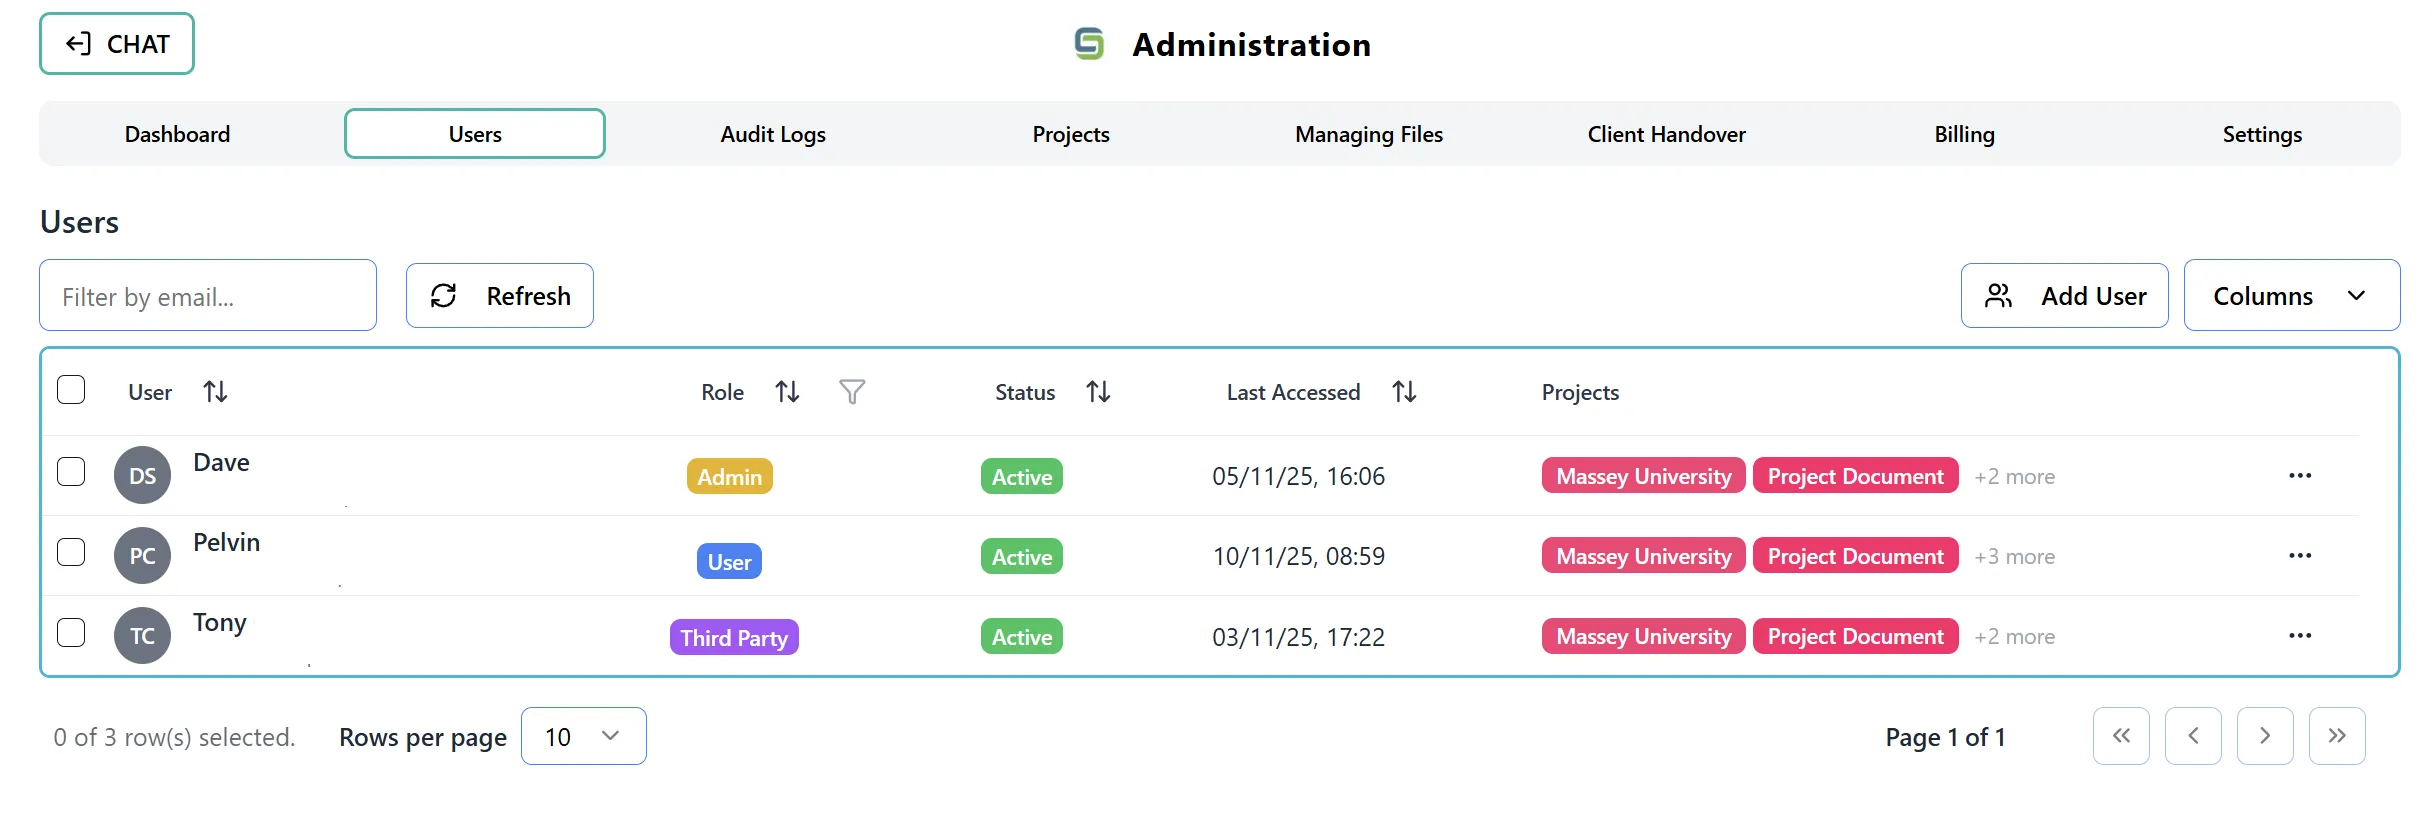
After accessing the Users tab, you will see a comprehensive table displaying all users in your organization:
Table Columns:
- Select: Checkbox to select individual users or all users on the page
- User: Displays user avatar, name, and email address
- Role: Shows the user’s role (Admin, User, or Third Party) with color-coded tags
- Organization: Displays the organization name the user belongs to
- Status: Shows the user’s current status (Active, Invited, Pending, or Inactive) with color-coded tags
- Last Accessed: Displays the date and time the user last accessed the system
- Projects: Shows project badges the user has access to (up to 2 visible, with “+X more” indicator)
- Actions: Three-dot menu (⋮) for accessing user management options
Top Controls:
- Filter by Email: Search box to filter users by email address
- Refresh Button: Updates the user list with the latest data
- Add User Button: Opens the form to create a new user
- Columns Dropdown: Allows you to show/hide specific columns
Filtering and Searching Users
Section titled “Filtering and Searching Users”Step 1: Filter by Email
Section titled “Step 1: Filter by Email”- Locate the “Filter by email…” search box at the top-left of the table
- Type the email address (or part of it) you want to search for
- The table will automatically filter to show only matching users
- Clear the search box to show all users again
Step 2: Filter by Role
Section titled “Step 2: Filter by Role”- Locate the “Role” column header in the table
- Click the filter icon (funnel icon) next to the “Role” header
- A dropdown menu will appear with options:
- All Roles: Shows all users regardless of role
- Admin: Shows only admin users
- User: Shows only regular users
- Third Party: Shows only third-party users
- Select the desired role filter
- The table will update to show only users with that role
Step 3: Sort Columns
Section titled “Step 3: Sort Columns”- Click on any column header that has a sort icon (up/down arrows)
- Click once to sort in ascending order
- Click again to sort in descending order
- Click a third time to remove sorting
- Sortable columns include: User, Role, Organization, Status, and Last Accessed
Viewing User Information
Section titled “Viewing User Information”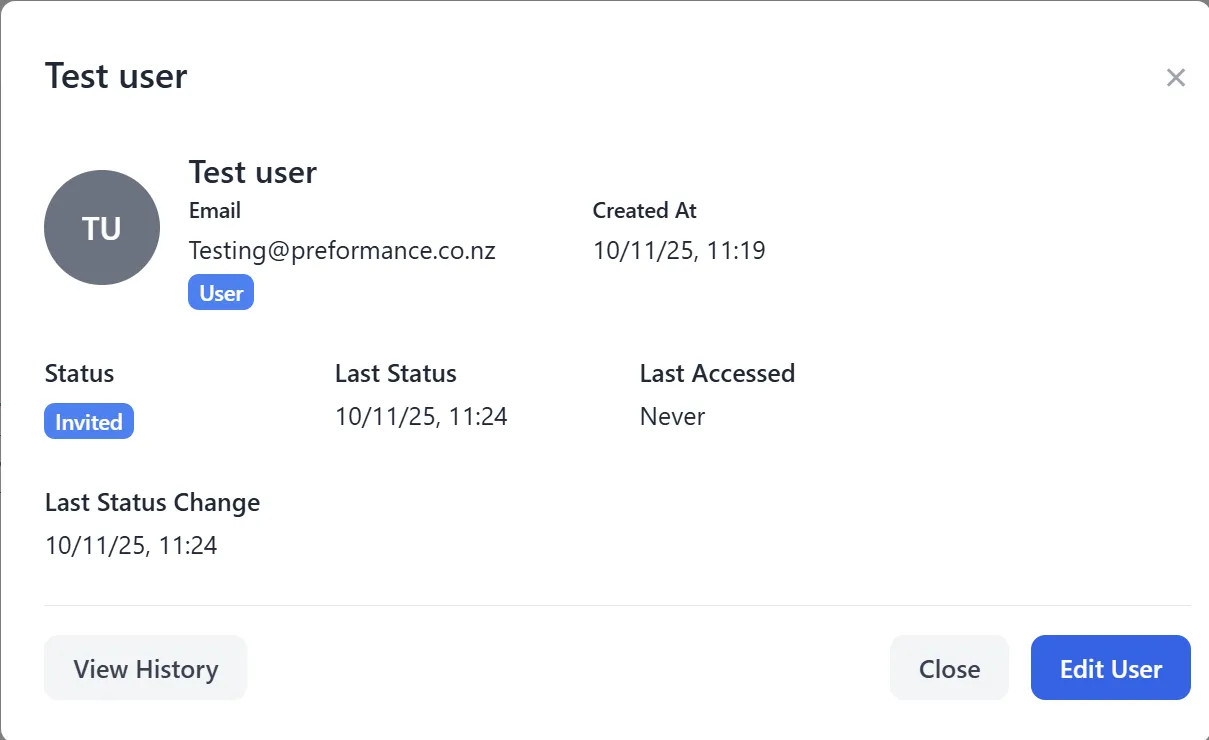
Step 1: View User Profile
Section titled “Step 1: View User Profile”- Click on any user row in the table (not on the actions menu or project badges)
- A User Profile Modal will open displaying:
- User avatar and name
- Email address
- Role and status
- Organization
- Project permissions
- Last accessed timestamp
- Account creation date
- Review the user information
- Click outside the modal or press “Close” to return to the table
Step 2: View Project Permissions
Section titled “Step 2: View Project Permissions”- In the Projects column, you can see project badges the user has access to
- Click on any project badge or the “+X more” indicator
- A Project Permissions Modal will open showing:
- All projects the user has access to
- Project names with color indicators
- Options to add or remove project access
- Make changes if needed (see “Managing Project Permissions” section)
- Click “Save” to apply changes or “Cancel” to close without saving
Adding New Users
Section titled “Adding New Users”Step 1: Open Add User Form
Section titled “Step 1: Open Add User Form”- Click the “Add User” button in the top-right area of the Users tab
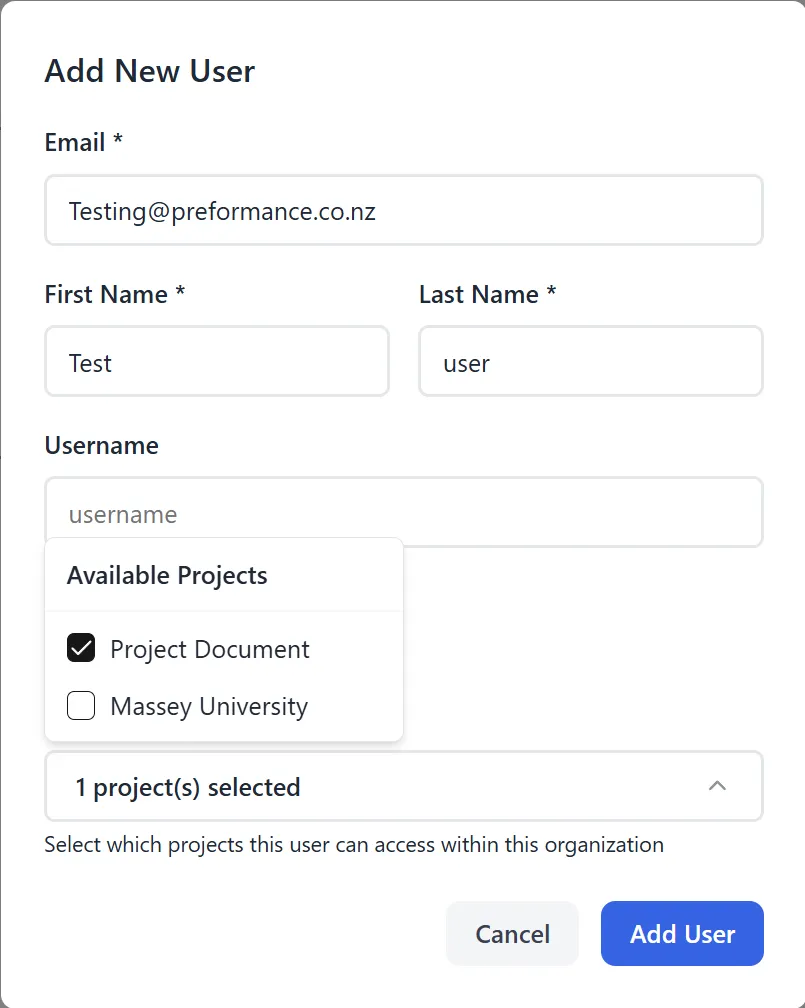
- The “Add New User” modal will open
Step 2: Fill in User Information
Section titled “Step 2: Fill in User Information”Required Fields:
- Email: Enter the user’s email address (required)
- First Name: Enter the user’s first name (required)
- Last Name: Enter the user’s last name (required)
Optional Fields: 4. Username: Enter a username (optional)
Step 3: Select User Role
Section titled “Step 3: Select User Role”- In the Role section, select one of the following:
- User: Regular organization user
- Third Party: External user with limited access
- Note: Admin role is assigned separately using the “Admin” checkbox” (see below)
Step 4: Set Admin Status (Optional)
Section titled “Step 4: Set Admin Status (Optional)”- If you want to make this user an admin, check the “Admin” checkbox
- When checked, the user will have admin privileges regardless of their role selection
- The role selection will be disabled and show “Overridden by Admin”
Step 5: Select Project Permissions
Section titled “Step 5: Select Project Permissions”- In the Project Permissions section, you must select at least one project
- Click on project checkboxes to grant access to specific projects
- You can select multiple projects
- Important: At least one project must be selected to create a new user
Step 6: Set Initial Status
Section titled “Step 6: Set Initial Status”- The user’s status will be set to “Invited” by default
- This means an invitation email will be sent to the user
Step 7: Create User
Section titled “Step 7: Create User”- Review all the information you’ve entered
- Click the “Save” or “Create User” button
- The system will:
- Create the user account
- Send an invitation email to the user
- Display a success message with a countdown timer
- The new user will appear in the users table with “Invited” status
Step 8: Invitation Success Confirmation
Section titled “Step 8: Invitation Success Confirmation”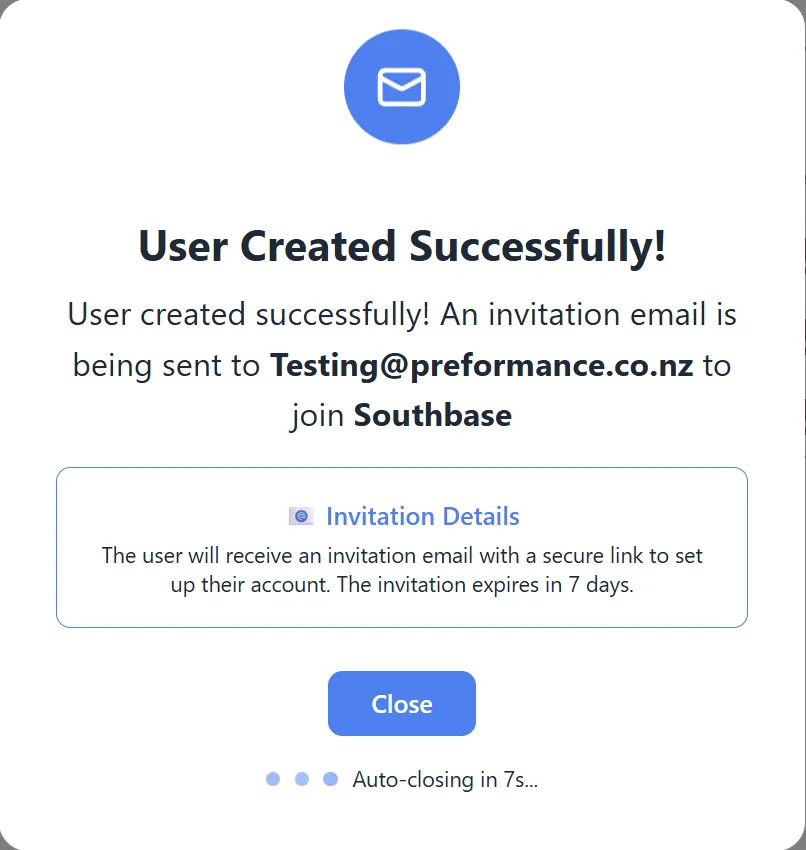
After creating a user, you will see:
- A success message confirming the invitation was sent
- The user’s email address
- A countdown timer (typically 8 seconds)
- The modal will automatically close when the timer reaches zero
Editing User Roles
Section titled “Editing User Roles”Step 1: Open Edit User Modal
Section titled “Step 1: Open Edit User Modal”- Locate the user you want to edit in the table
- Click the three-dot menu (⋮) in the Actions column
- Select “Edit Role” from the dropdown menu
- The “Edit User Role” modal will open
Note: You cannot edit your own role. If you try to edit yourself, you’ll see a message: “You cannot modify your own admin privileges.”
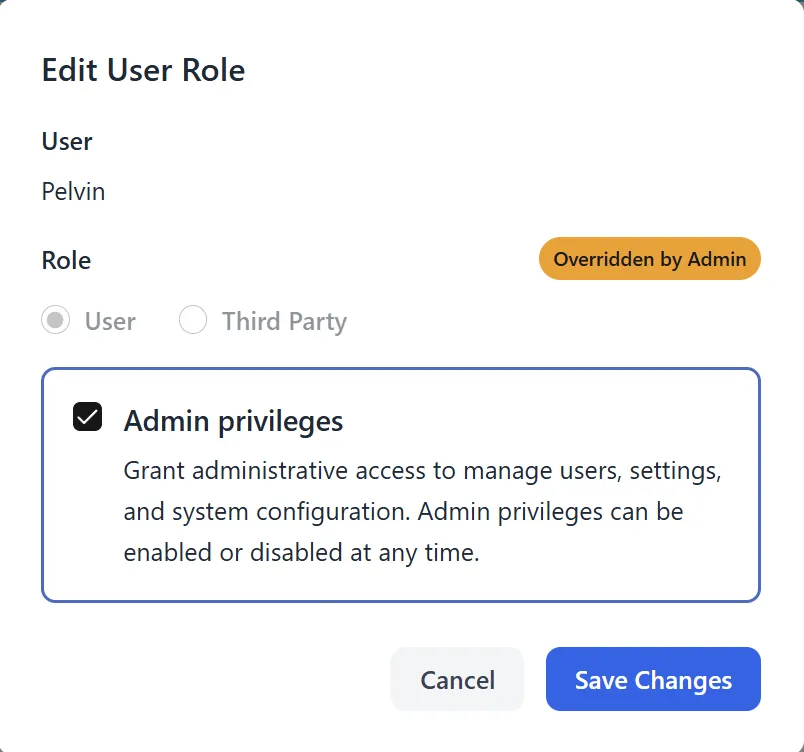
Step 2: Review Current User Information
Section titled “Step 2: Review Current User Information”The modal displays:
- User’s name and email (read-only)
- Current role and admin status
- Current project permissions
Step 3: Change User Role
Section titled “Step 3: Change User Role”- In the Role section, select the new role:
- User: Regular organization user
- Third Party: External user with limited access
- Note: If the user is an admin, the role selection will be disabled and show “Overridden by Admin”
Step 4: Change Admin Status
Section titled “Step 4: Change Admin Status”- Check or uncheck the “Admin” checkbox to grant or remove admin privileges
- Important: You cannot remove your own admin privileges
- If you try to modify your own admin status, you’ll see an error message
Step 5: Update Project Permissions (Optional)
Section titled “Step 5: Update Project Permissions (Optional)”- In the Project Permissions section, you can:
- Check projects to grant access
- Uncheck projects to remove access
- You can modify the project permissions as needed
Step 6: Save Changes
Section titled “Step 6: Save Changes”- Review all changes you’ve made
- Click the “Save” button
- The system will:
- Update the user’s role and permissions
- Display a success message if the role changed
- Update the user in the table immediately
Step 7: Role Change Success Confirmation
Section titled “Step 7: Role Change Success Confirmation”If the user’s role changed, you will see:
- A success message showing the role change
- “From [old role] to [new role]” confirmation
- A countdown timer
- The modal will automatically close
Changing User Status
Section titled “Changing User Status”Step 1: Open Status Change Modal
Section titled “Step 1: Open Status Change Modal”- Locate the user whose status you want to change
- Click the three-dot menu (⋮) in the Actions column
- Select “Change Status” from the dropdown menu
- The “Change User Status” modal will open
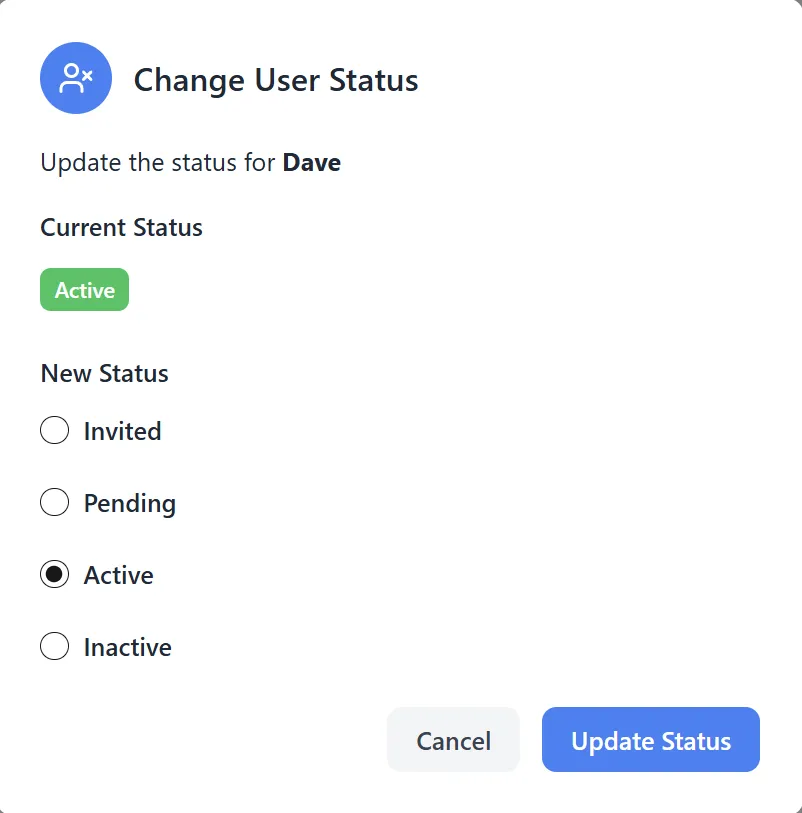
Step 2: Select New Status
Section titled “Step 2: Select New Status”- Choose from the following status options:
- Active: User can access the system
- Inactive: User account is disabled
- Invited: User has been invited but hasn’t accepted yet
- Pending: User is in the process of completing registration
Step 3: Confirm Status Change
Section titled “Step 3: Confirm Status Change”- Review the status change you’re about to make
- Click the “Save” or “Update Status” button
- The user’s status will be updated immediately
- A success message will appear confirming the status change
Step 4: Status Update Success
Section titled “Step 4: Status Update Success”After changing a user’s status, you will see:
- A success message confirming the status change
- The new status displayed
- A countdown timer
- The modal will automatically close
Managing Project Permissions
Section titled “Managing Project Permissions”Step 1: Access Project Permissions
Section titled “Step 1: Access Project Permissions”You can access project permissions in two ways:
Method A: From the Projects Column
- Click on any project badge in the Projects column
- Or click the “+X more” indicator if there are more than 2 projects
Method B: From the Actions Menu
- Click the three-dot menu (⋮) in the Actions column
- Select “Project Permissions” from the dropdown menu
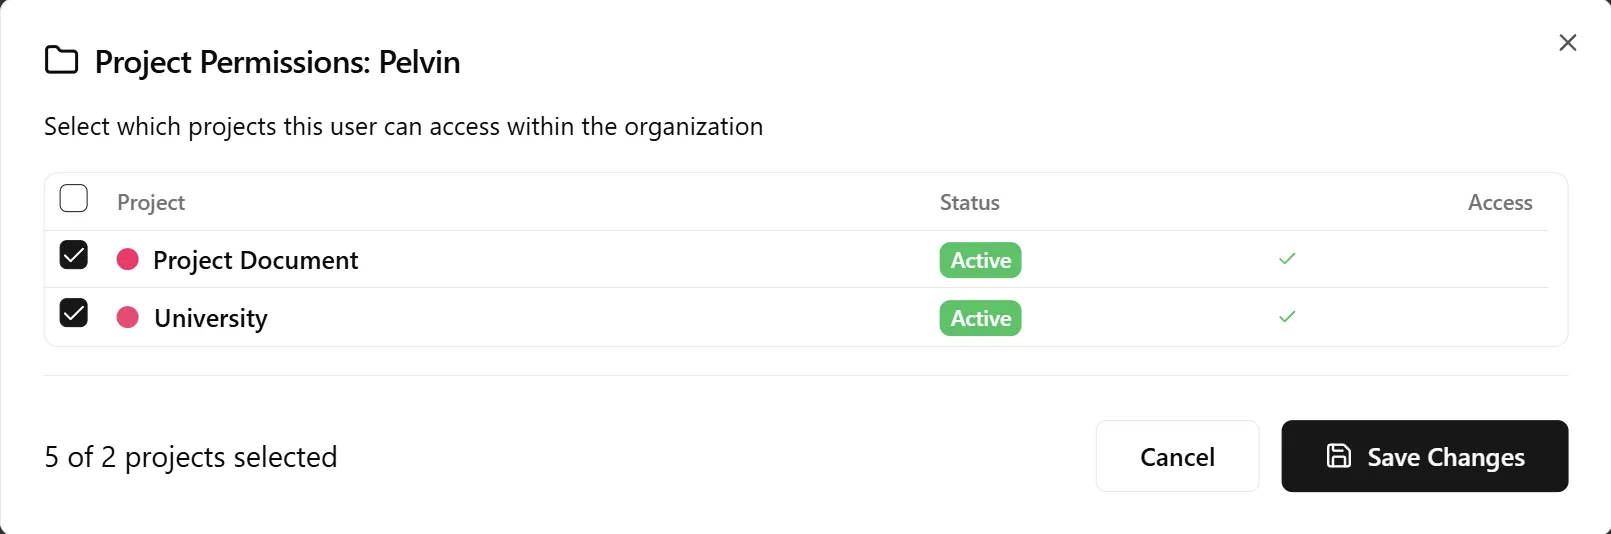
Step 2: View Current Permissions
Section titled “Step 2: View Current Permissions”The Project Permissions modal displays:
- User’s name and email
- List of all available projects in your organization
- Checkboxes indicating which projects the user currently has access to
- Project names with color-coded indicators
Step 3: Modify Project Access
Section titled “Step 3: Modify Project Access”- To grant access: Check the checkbox next to a project name
- To remove access: Uncheck the checkbox next to a project name
- You can select or deselect multiple projects at once
Step 4: Save Changes
Section titled “Step 4: Save Changes”- Review the project permissions you’ve selected
- Click the “Save” button
- The changes will be applied immediately
- The Projects column in the table will update to reflect the new permissions
Step 5: Cancel Changes
Section titled “Step 5: Cancel Changes”- If you don’t want to save your changes, click “Cancel”
- The modal will close without applying any changes
Resending Invitations
Section titled “Resending Invitations”Step 1: Identify Invited Users
Section titled “Step 1: Identify Invited Users”- Look for users with “Invited” status in the Status column
- These are users who have been invited but haven’t accepted the invitation yet
Step 2: Resend Invitation
Section titled “Step 2: Resend Invitation”- Locate the user with “Invited” status
- Click the three-dot menu (⋮) in the Actions column
- Select “Resend Invite” from the dropdown menu
- The system will:
- Send a new invitation email to the user
- Update the user’s status to “Invited”
- Display a success message
Step 3: Confirmation
Section titled “Step 3: Confirmation”- You will see a confirmation message: “Invitation resent successfully!”
- The user will receive a new invitation email with a link to accept the invitation
Deleting Users
Section titled “Deleting Users”Step 1: Open Delete Confirmation
Section titled “Step 1: Open Delete Confirmation”- Locate the user you want to delete
- Click the three-dot menu (⋮) in the Actions column
- Select “Delete User” from the dropdown menu
- The “Delete User” confirmation modal will open
Step 2: Confirm Deletion
Section titled “Step 2: Confirm Deletion”Important Restrictions:
- You cannot delete admin users - you must remove admin privileges first
- You cannot delete your own account - you’ll see an error message if you try
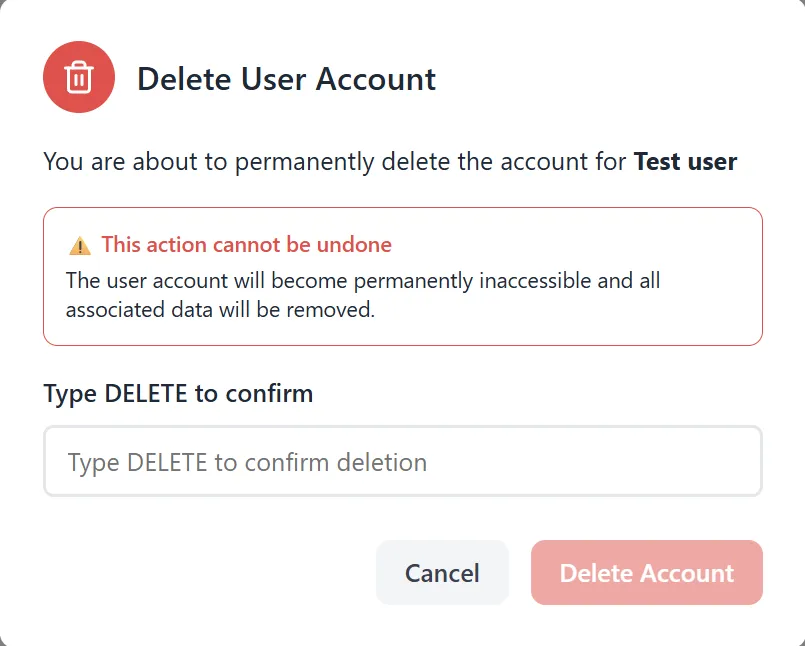
- The modal will display:
- A warning message about permanent deletion
- The user’s name and email
- A confirmation text field
Step 3: Type Confirmation Text
Section titled “Step 3: Type Confirmation Text”- To confirm deletion, you must type “DELETE” (in uppercase) in the confirmation field
- The delete button will remain disabled until you type the exact text
- This prevents accidental deletions
Step 4: Execute Deletion
Section titled “Step 4: Execute Deletion”- After typing “DELETE”, the “Delete User” button will become enabled
- Click the “Delete User” button
- The system will:
- Permanently delete the user account
- Remove the user from the table immediately
- Display a success message with a countdown timer
Step 5: Deletion Success Confirmation
Section titled “Step 5: Deletion Success Confirmation”After deleting a user, you will see:
- A success message confirming the deletion
- The deleted user’s name
- A countdown timer (typically 10 seconds)
- The modal will automatically close
Customizing Table View
Section titled “Customizing Table View”Step 1: Show/Hide Columns
Section titled “Step 1: Show/Hide Columns”- Click the “Columns” dropdown button in the top-right area
- A dropdown menu will appear listing all available columns
- Check or uncheck columns to show or hide them
- The table will update immediately to reflect your changes
Step 2: Available Columns
Section titled “Step 2: Available Columns”You can toggle visibility for:
- Organization: Show/hide the organization column
- Last Status: Show/hide the last status change timestamp
- Created: Show/hide the account creation date
- Other optional columns as available
Step 3: Reset Column Visibility
Section titled “Step 3: Reset Column Visibility”- To show all columns again, check all boxes in the Columns dropdown
- To hide columns, simply uncheck them
Key Features Summary
Section titled “Key Features Summary”User Management Features
Section titled “User Management Features”- Add Users: Create new user accounts with invitations
- Edit Roles: Change user roles and admin status
- Change Status: Update user account status (Active, Inactive, Invited, Pending)
- Delete Users: Permanently remove user accounts (with confirmation)
- View Profiles: View detailed user information
Permission Management Features
Section titled “Permission Management Features”- Project Permissions: Grant or revoke access to specific projects
- Role-Based Access: Assign roles (User, Third Party, Admin)
- Admin Privileges: Grant or remove admin privileges
Communication Features
Section titled “Communication Features”- Resend Invitations: Send new invitation emails to invited users
- Resend Codes: Resend verification codes to pending users
Table Features
Section titled “Table Features”- Filtering: Filter by email or role
- Sorting: Sort by any column (User, Role, Status, Last Accessed, etc.)
- Search: Quick search by email address
- Column Visibility: Show or hide columns as needed
- Refresh: Update the user list with latest data
Best Practices
Section titled “Best Practices”Before Adding Users
Section titled “Before Adding Users”- Verify Email: Ensure the email address is correct before creating the user
- Plan Permissions: Decide which projects the user should have access to
- Choose Role: Determine if the user should be a regular user, third party, or admin
- Check Existing Users: Use the filter to check if the user already exists
When Managing Users
Section titled “When Managing Users”- Review Before Changes: Always review user information before making changes
- Test Permissions: Verify project permissions are correct after changes
- Monitor Status: Keep track of user statuses (Invited, Pending, Active)
- Resend When Needed: Resend invitations if users haven’t accepted after a reasonable time
Security Considerations
Section titled “Security Considerations”- Admin Privileges: Only grant admin privileges to trusted users
- Role Assignment: Assign appropriate roles based on user needs
- Project Access: Grant project access only to users who need it
- Regular Review: Periodically review user accounts and permissions
Troubleshooting
Section titled “Troubleshooting”Issue: Cannot Edit Own Role
Section titled “Issue: Cannot Edit Own Role”Solution:
- This is by design for security reasons
- Ask another admin to modify your role if needed
- You cannot modify your own admin privileges
Issue: Cannot Delete Admin User
Section titled “Issue: Cannot Delete Admin User”Solution:
- You must first remove admin privileges from the user
- Edit the user and uncheck the “Admin” checkbox
- Then you can delete the user
Issue: Cannot Delete Own Account
Section titled “Issue: Cannot Delete Own Account”Solution:
- This is a security feature to prevent accidental self-deletion
- Ask another admin to delete your account if needed
Issue: User Not Receiving Invitation Email
Section titled “Issue: User Not Receiving Invitation Email”Solutions:
- Check the user’s email address is correct
- Use “Resend Invite” to send a new invitation
- Verify email server configuration
- Check spam/junk folders
Issue: Project Permissions Not Saving
Section titled “Issue: Project Permissions Not Saving”Solutions:
- Ensure at least one project is selected
- Refresh the page and try again
- Check that you have admin privileges
- Verify the user account is active
Issue: Filter Not Working
Section titled “Issue: Filter Not Working”Solutions:
- Clear the filter and try again
- Check for typos in the email search
- Refresh the page
- Try filtering by role instead
Security Notes
Section titled “Security Notes”- Only users with admin privileges can access the Users tab
- Admins cannot modify their own roles or delete their own accounts
- Admin users cannot be deleted - remove admin privileges first
- All user management actions are logged in the audit trail
- User deletions are permanent and cannot be undone
- Project permissions follow organization-level access controls